Blodgett 17712 Main Extension Spring 32 Coils 8" x 1-3/4"

Special Price $36.09 Regular Price $78.34
In stock
SKU
17712
Manufacturer:
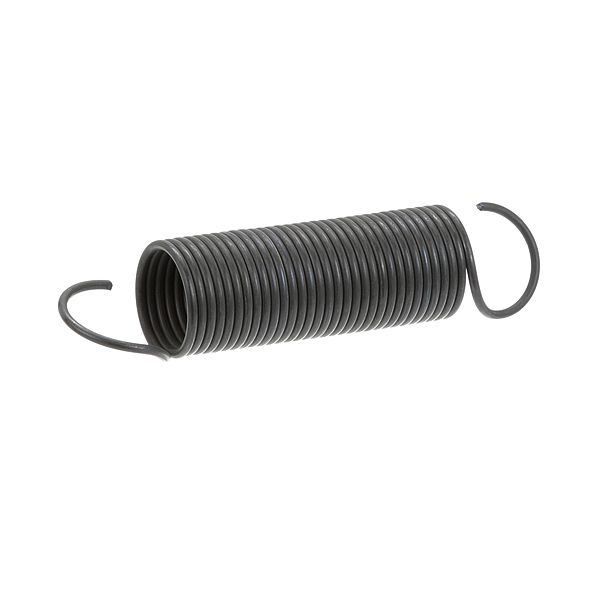
The Blodgett 17712 Main Extension Spring is an essential part that is used to provide tension in a mechanical assembly by stretching and contracting. It has 32 coils, and it can be extended and retracted under load. This spring is 8" long and 1-3/4" in diameter and is installed in ovens, equipment or machinery where it joins moving parts and ensures that there is the correct tension. Its coiled design gives it a uniform force and fits well in the specified mounting points of the assembly.

Dimensions

  • Length: 8 In
  • Width: 1.75 In
  • Height: 1.75 In
  • Weight: 1 lbs
https://partsfe.com/media/catalog/product/b/l/blodgett-17712-8-x-1-3-4-main-extension-spring-32-coils-14742-2.jpg

Product Notes

  • Extension Spring, Main Spring, 8" X 1-3/4" Overall,
  • 4-3/4" Body Only, 32 Coils
  • Blodgett 1048, 1060
BLODGETT:
Write Your Own Review
You're reviewing:Blodgett 17712 Main Extension Spring 32 Coils 8" x 1-3/4"
Your Rating
Customer Questions
What maintenance is required for the Blodgett 17712 Main Extension Spring?

Regularly inspect the spring for signs of wear, rust, or deformation. Lubricate lightly if recommended to prevent corrosion. Ensure proper alignment during installation and avoid overstretching. Safety precautions include wearing gloves to prevent pinching or injury.

What are common issues with the Blodgett 17712 Main Extension Spring?

  • Loss of tension or reduced elasticity.
  • Rust or corrosion buildup.
  • Breakage or coil deformation.
  • Misalignment is causing improper operation.

We strive to provide our customers with a hassle-free and efficient shopping experience. Our shipping policy ensures the timely delivery of your orders and complete customer satisfaction. View More

We are committed to ensuring your complete satisfaction with every purchase. We understand that circumstances may arise where you must return a product or request a refund. If for any reason you are not satisfied, you may return the item(s) according to the terms outlined below. View More

This Payment Policy outlines the terms and conditions governing all payments made for products purchased through our website. By making a purchase, you agree to be bound by this Payment Policy. View More

Installation Steps

Step1: Ensure the equipment is powered off and completely cool before starting.

Step2: Locate the worn or broken extension spring attached to the door hinge mechanism.

Step3: Use pliers to carefully unhook and remove the old spring.

Step4: Attach one end of the new spring to the frame mounting hook.

Step5: Stretch the spring and connect the other end to the hinge bracket.

Step6: Slowly open and close the door to confirm proper tension and smooth operation.