Middleby Marshall 33984 Oven 6" Thermocouple Probe Assembly W/wire Leads

Special Price $76.23 Regular Price $137.45
In stock
SKU
33984
Oven Parts,
Manufacturer:
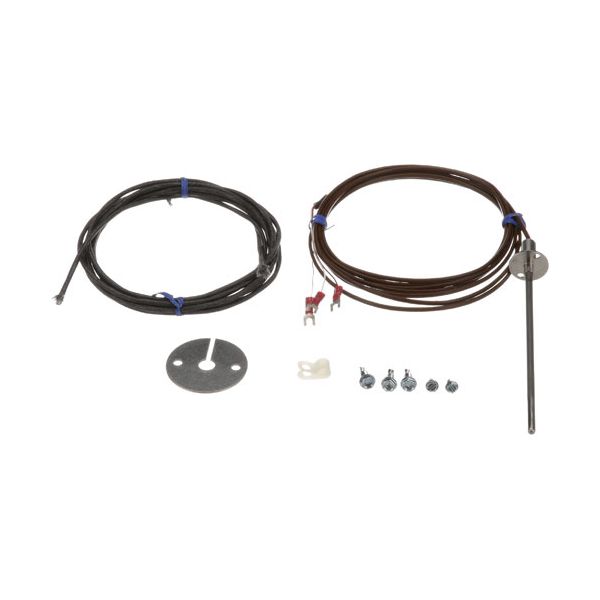
The Middleby Marshall 33984 Thermocouple kit is used in the ovens and tracks the internal oven temperature and sends a signal to the control. It is installed close to the burner assembly of the oven and allows the oven to maintain the temperature to provide a consistent cooking performance. This thermocouple kit allows the accurate feedback of the control system in the oven helps to increase in the level of safety and enables the operation in commercial cooking conditions.

Dimensions

  • Length: 6 In
  • Width: 8 In
  • Height: 0.5 In
  • Weight: 0.22 lbs
https://partsfe.com/media/catalog/product/m/i/middleby-marshall-33984-oven-6-thermocouple-probe-assembly-w-wire-leads-75337-2.jpg

Product Notes

  • Thermocouple Probe, Bulb = 6" Long~
  • 3 Wire Leads,
  • W/Wire Clamp, Screws & Attachment Plate.
  • Middleby Marshall Oven Series: Ps 300, Ps555,Ps570
More Information
Disable SaleableNo
MIDDLEBY MARSHALL:
Write Your Own Review
You're reviewing:Middleby Marshall 33984 Oven 6" Thermocouple Probe Assembly W/wire Leads
Your Rating
Customer Questions
What maintenance is required for the Middleby Marshall 33984 Thermocouple Probe Assembly?

Inspect the probe for dirt, corrosion, or physical damage. Clean gently with a soft cloth and ensure secure connections to the oven control system. Disconnect power and gas supply before servicing. Proper care ensures accurate flame detection and secure oven operation.

What are the common issues with the Middleby Marshall 33984 Thermocouple Probe Assembly?

  • Flame sensing can be inaccurate due to buildup.
  • Loose or corroded connections.
  • Intermittent signal affecting oven heating.
  • Signal may drop under high temperature conditions.
  • Incorrect installation causing faulty readings.

We strive to provide our customers with a hassle-free and efficient shopping experience. Our shipping policy ensures the timely delivery of your orders and complete customer satisfaction. View More

We are committed to ensuring your complete satisfaction with every purchase. We understand that circumstances may arise where you must return a product or request a refund. If for any reason you are not satisfied, you may return the item(s) according to the terms outlined below. View More

This Payment Policy outlines the terms and conditions governing all payments made for products purchased through our website. By making a purchase, you agree to be bound by this Payment Policy. View More

Installation Steps

Step1: Turn off the oven and let it cool completely.

Step2: Remove the old probe assembly by unscrewing and disconnecting wires.

Step3: Position the new probe in the same location inside the oven.

Step4: Connect wires exactly as they were on the old assembly.

Step5: Secure the probe with screws or brackets.

Step6: Power on oven and test temperature readings safely.