Rankin Delux RD80-06 BJ Thermostat W/ Bypass 3/16" x 8" Nickel Bulb

Special Price $188.21 Regular Price $290.00
In stock
SKU
RD80-06
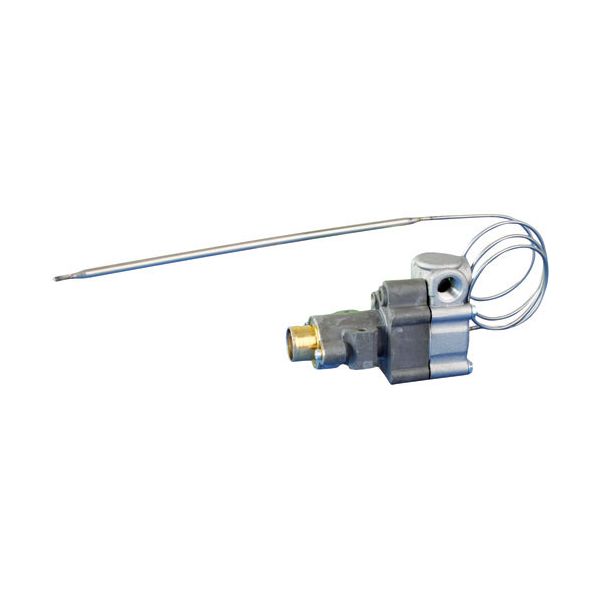
The Rankin Delux RD80-06 Griddle Control Thermostat is a temperature controller that measures the amount of heat on the surface and opens or closes the electrical connection to the heating element. It switches on and off power to sustain the preferred temperature level. This will be installed on commercial griddles and will be mounted directly into the control panel to regulates the amount of heat produced and will be compatible with the existing temperature control system on the appliance.

Dimensions

  • Length: 9.5 In
  • Width: 2 In
  • Height: 3 In
  • Weight: 0.6 lbs
https://partsfe.com/media/catalog/product/r/a/rankin-delux-rd80-06-bj-thermostat-w-bypass-3-16-x-8-nickel-bulb-82260.jpg

Product Notes

  • Viewed From Rear: See "Bj Outlet Positions"
  • W/ By-Pass Adj At Top & Gas Inlet Down
  • Bjwa Thermostat, Temp 150-400 F, 24" Cap
  • 3/16" X 8" Nickel Bulb W/ Fiberglass Sheeth,
  • Rotation 180 Degress, No Pilot, 1/4" Fpt Outlets "B" & "D"
  • Imperial Knob # 22-1251 Bj T'Stat Red Knob
  • [ 2" Dia ] [ Off-Lo-150-400-Hi] [Mount 11/16" Dia.]
  • [Position Notch Up ]
  • 11/16" Long Protrusion On Back Of Knob.
  • Imperial Grill Ihr, Ir, Itg
  • Royal Range
Write Your Own Review
You're reviewing:Rankin Delux RD80-06 BJ Thermostat W/ Bypass 3/16" x 8" Nickel Bulb
Your Rating
Customer Questions
What maintenance is required for the Rankin Delux RD80-06 Thermostat?

Inspect the sensor and wiring for signs of wear. Ensure the thermostat is properly mounted and calibrated. Proper care maintains consistent heating performance for the appliance.

What are the common issues with the Rankin Delux RD80-06 Thermostat?

  • Temperature fluctuates during operation.
  • Sensor probe failure.
  • Erratic element cycling.
  • Loose mounting or wiring issues.

We strive to provide our customers with a hassle-free and efficient shopping experience. Our shipping policy ensures the timely delivery of your orders and complete customer satisfaction. View More

We are committed to ensuring your complete satisfaction with every purchase. We understand that circumstances may arise where you must return a product or request a refund. If for any reason you are not satisfied, you may return the item(s) according to the terms outlined below. View More

This Payment Policy outlines the terms and conditions governing all payments made for products purchased through our website. By making a purchase, you agree to be bound by this Payment Policy. View More

Installation Steps

Step1: Turn off power to the appliance before starting.

Step2: Remove the existing thermostat by unscrewing it and disconnecting wires.

Step3: Install the thermostat in the same position using mounting screws.

Step4: Reattach wires to the correct terminals, ensuring secure connections.

Step5: Restore power and test the appliance for proper operation.