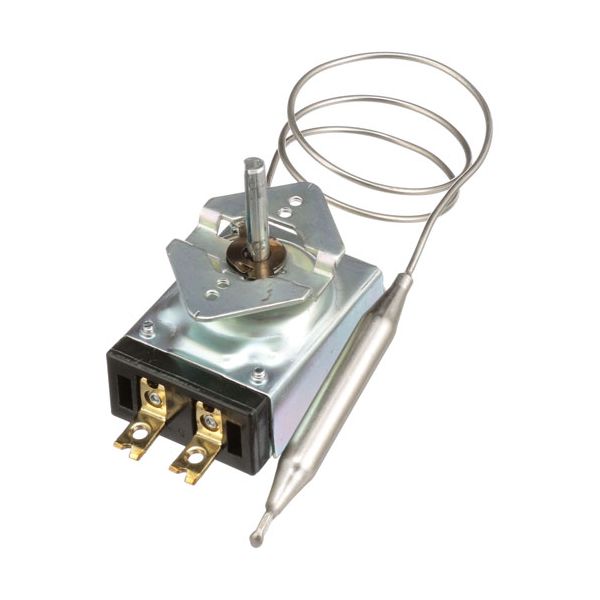
Star Mfg 2T-6447 Oven Thermostat W/18" CAP, 3/8" X 3-1/4" BULB
Special Price $126.28 Regular Price $194.58
In stock
SKU
2T-6447
Manufacturer:

The Star Mfg 2T-6447 Thermostat is a high-accuracy temperature-controlling component used in cooking appliances. It has an 18-inch capillary and a 3/8” x 3-1/4” bulb and works best at temperatures between 175°F and 550°F. This thermostat is used by a client to control the temperatures in food processing thus enhancing food quality and standards. Its construction enables the gadget to last long, especially in areas with heft use such as restaurants and catering cost-effectiveness in electricity use, and consistency in temperature that eventually enhance food as well as customers’ satisfaction.
Dimensions
- Length: 7 In
- Width: 3 In
- Height: 2 In
- Weight: 0 lbs
Product Notes
- 18" Cap, Bulb = 3/8" X 3-1/4"