Roundup - AJ Antunes 7000215 Thermostat W/ 5/16" X 4-1/2" Bulb Cap 24" 20A 120/240V

Special Price $92.04 Regular Price $120.00
In stock
SKU
7000215
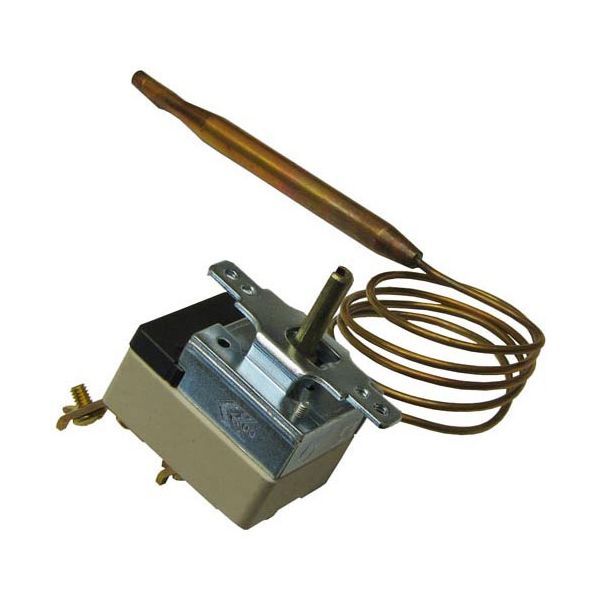
The Roundup AJ Antunes 7000215 Thermostat operates as an industrial temperature controller for diverse applications through its precise control functions. The partincludes a 5/16" x 4-1/2" bulb which works with a 24" capillary to deliver precise temperature measurement. The thermostat runs on 20A power while using 120/240V electricity to system control. The product features 1-7/8" mounting center dimensions and 1-3/4" x 2-1/4" compact size which enables simple installation in limited spaces. The thermostat demonstrates high efficiency together with durability properties that provide performance in systems that demand steady temperature management thus improveing system reliability energy usage.

Dimensions

  • Length: 5.5 In
  • Width: 3 In
  • Height: 3 In
  • Weight: 0.5 lbs
https://partsfe.com/media/catalog/product/r/o/roundup-aj-antunes-7000215-thermostat-w-5-16-x-4-1-2-bulb-cap-24-20a-120-240v-43831-2.jpg

Product Notes

  • Thermostat, [ Type- Selco Cap106315 ] [ Temp 60-250F]
  • [ Bulb 5/16" X 4-1/2" ] [ Cap 24" ]
  • 20A, 120/240V
  • Roundup
  • Grill Series: Hdc, Sc
  • Steamer Series: Hwd
  • Note: For(Models Hdc-21A, Hdc-30A, Hdc-35A) Use
  • # 22-1276 Dial 60-250.
  • For(Model Hdc-50A Only)Use Dial # 22-1454 1-10
  • Terminal Screws Are 8-32.
  • Original Round-Up Comes W/ 2 Dials 60-250 & 1-10 And
  • Mounting Screws 6-32.
Write Your Own Review
You're reviewing:Roundup - AJ Antunes 7000215 Thermostat W/ 5/16" X 4-1/2" Bulb Cap 24" 20A 120/240V
Your Rating
Customer Questions
What maintenance is required for the Roundup - AJ Antunes 7000215 Thermostat?

Inspect the thermostat for secure mounting and correct sensor positioning. Check wiring and connections for signs of wear. Proper care ensures stable heating during operation.

What are common issues with the Roundup - AJ Antunes 7000215 Thermostat?

  • Appliance fails to maintain temperature.
  • Sensor tip misaligned.
  • Heating cycles irregular.
  • Loose electrical connectors.

We strive to provide our customers with a hassle-free and efficient shopping experience. Our shipping policy ensures the timely delivery of your orders and complete customer satisfaction. View More

We are committed to ensuring your complete satisfaction with every purchase. We understand that circumstances may arise where you must return a product or request a refund. If for any reason you are not satisfied, you may return the item(s) according to the terms outlined below. View More

This Payment Policy outlines the terms and conditions governing all payments made for products purchased through our website. By making a purchase, you agree to be bound by this Payment Policy. View More

Installation Steps

Step1: Turn off power to the appliance before starting installation to prevent electrical shock.

Step2: Remove the old thermostat by disconnecting wires and unscrewing mounting hardware.

Step3: Mount the new thermostat securely in place.

Step4: Reconnect wires according to the original configuration.

Step5: Restore power and test the thermostat to ensure proper operation.

Step6: Avoid touching exposed terminals while powered.