
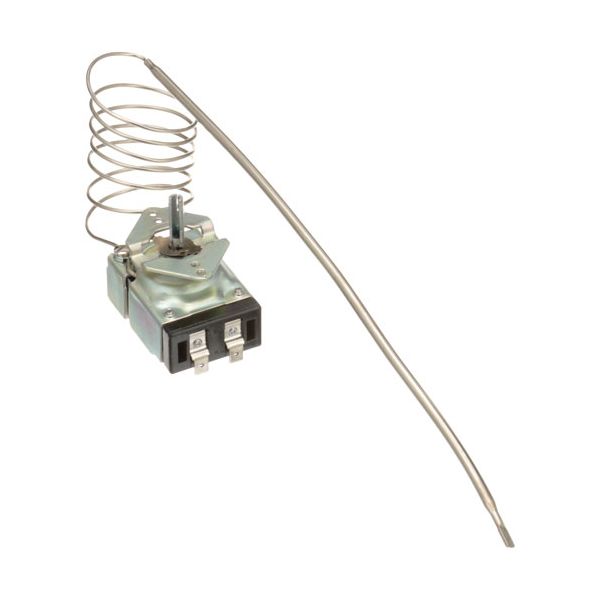
Alto-Shaam TT-34092 Oven Thermostat W/ 3/16" X 11-5/8" Bulb K Type

Special Price $132.68 Regular Price $261.49
In stock
SKU
TT-34092
Manufacturer:

The Alto-Shaam TT-34092 Thermostat works by detecting the temperature inside the oven and regulating the amount of electricity flowing to keep the desired amount of heat. It operates by a temperature-sensitive system that completes or breaks the circuit when the oven reaches the desired temperature in the 140° -500° F range. This thermostat is installed in the control system of the oven and is attached to the heating components as well as to the temperature dial.

Dimensions

  • Length: 12 In
  • Width: 2 In
  • Height: 2.5 In
  • Weight: 0.6 lbs
https://partsfe.com/media/catalog/product/a/l/alto-shaam-tt-34092-oven-thermostat-w-3-16-x-11-5-8-bulb-k-type-60437.jpg

Product Notes

  • [ Type - K ] [ Temp 140-500 ] [ Bulb 3/16" X 11-5/8" ]
  • [ Cap 36" ] Mount 1, [ For Dial Use: # 22-1065
  • Back T'Stat Knob W/ White Numbers, [ 2-1/4" Dia ]
  • [ Off-500-200] [Mount .187"] [Flat Down ]
  • Blodgett
  • Oven Series: Dfg (Cook Only),Ef /Eze, Fa/Gzl (Cook & Hold
  • W/Elec Ignition).
  • Dynamic Cooking Systems Oven Fsco.
ALTO-SHAAM:
AMERICAN RANGE:
DYNAMIC COOKING SYSTEMS:
13058, DCS13058
U-LINE:
5300-197, K920-36
Write Your Own Review
You're reviewing:Alto-Shaam TT-34092 Oven Thermostat W/ 3/16" X 11-5/8" Bulb K Type
Your Rating
Customer Questions
What maintenance is required for the Alto-Shaam TT-34092 Thermostat?

Inspect and calibrate the thermostat for accurate oven temperature control regularly. Clean sensing bulb to prevent grease buildup and ensure responsiveness. Check wiring connections and follow safety procedures during service repairs.

What are common issues with the Alto-Shaam TT-34092 Thermostat?

  • Inaccurate oven temperature readings.
  • Thermostat drift or calibration failure.
  • Loose or damaged wiring connections.
  • Intermittent heating or cycling issues.
  • Faulty sensing bulb response.
  • Uneven or inconsistent oven heat distribution.

We strive to provide our customers with a hassle-free and efficient shopping experience. Our shipping policy ensures the timely delivery of your orders and complete customer satisfaction. View More

We are committed to ensuring your complete satisfaction with every purchase. We understand that circumstances may arise where you must return a product or request a refund. If for any reason you are not satisfied, you may return the item(s) according to the terms outlined below. View More

This Payment Policy outlines the terms and conditions governing all payments made for products purchased through our website. By making a purchase, you agree to be bound by this Payment Policy. View More

Installation Steps

Step1: Disconnect power and let oven cool completely to avoid electric shock or burns.

Step2: Remove access panel and note existing wiring and bulb position.

Step3: Carefully detach old thermostat and capillary bulb.

Step4: Install new thermostat bulb in same location and secure properly.

Step5: Reconnect wiring to matching terminals.

Step6: Refit panel, restore power, and test temperature control.