Cleveland 20476 60 Min Mechanical Timer with Knob SPDT 20A ON/ON Switching

Special Price $286.29 Regular Price $358.75
In stock
SKU
20476
Manufacturer:
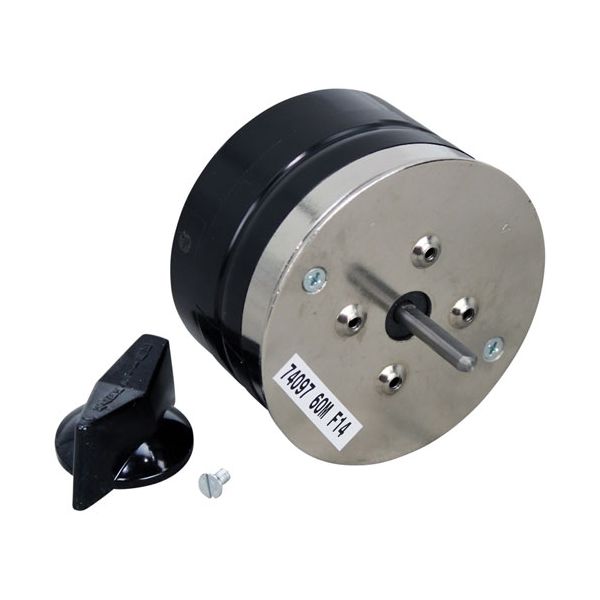
The Cleveland 20476 Timer with Knob is a 20-amp SPDT 60-minute control system intended to be used in commercial cooking equipment. It enables the user to set and regulate cooking or working cycles by manually changing the timer knob. Placed on the control panel of the appliance it connects with heating elements, or other working circuits to turn on, off, or control operations based on the time chosen. Its position in the system is essential in ensure that, accurate cooking times are achieved.

Dimensions

  • Length: 3 In
  • Width: 2.5 In
  • Height: 2.5 In
  • Weight: 0.7 lbs
https://partsfe.com/media/catalog/product/c/l/cleveland-20476-60-min-mechanical-timer-with-knob-spdt-20a-on-on-switching-50916-2.jpg

Product Notes

  • 60 Min Timer W/ Knob
  • Volt/Amp( 20A ), Action( Spdt )~
  • Function(
  • On/On )~
  • Terminal( 3~
  • Screw )~
  • Contacts( N.O/N.C )
  • Mechanical Timer W/Switching Contacts )
  • Knob = # 22-1111
  • For Dial Plate, 0 To 55, Use # 22-1110
  • Cleveland Cet-5
  • For New Style Use #421524
  • For Cles43905, Use Ap# 8012105
More Information
Disable SaleableNo
CLEVELAND:
20476, 43905, CLE20476, CLE43905
Write Your Own Review
You're reviewing:Cleveland 20476 60 Min Mechanical Timer with Knob SPDT 20A ON/ON Switching
Your Rating
Customer Questions
What maintenance is required for the Cleveland 20476 Mechanical Timer?

Periodically inspect the timer for dust, debris, or signs of damage. Clean the dial and contacts gently, and ensure connections are tight. Always disconnect power before servicing. Regular maintenance ensures accurate timing and smooth operation.

What are the common issues with the Cleveland 20476 Mechanical Timer?

  • The timer may run too fast or too slow.
  • Fails to start or stop the appliance.
  • Loose or corroded electrical contacts.
  • Inconsistent timing affects cooking results.
  • Humming or clicking noises from the mechanism.

We strive to provide our customers with a hassle-free and efficient shopping experience. Our shipping policy ensures the timely delivery of your orders and complete customer satisfaction. View More

We are committed to ensuring your complete satisfaction with every purchase. We understand that circumstances may arise where you must return a product or request a refund. If for any reason you are not satisfied, you may return the item(s) according to the terms outlined below. View More

This Payment Policy outlines the terms and conditions governing all payments made for products purchased through our website. By making a purchase, you agree to be bound by this Payment Policy. View More

Installation Steps

Step1: Turn off the appliance power.

Step2: Access the control panel and remove the existing timer.

Step3: Disconnect the wires, noting positions.

Step4: Install the new timer and reconnect wiring.

Step5: Mount securely and restore power.

Step6: Test the timer operation by running a short cycle.