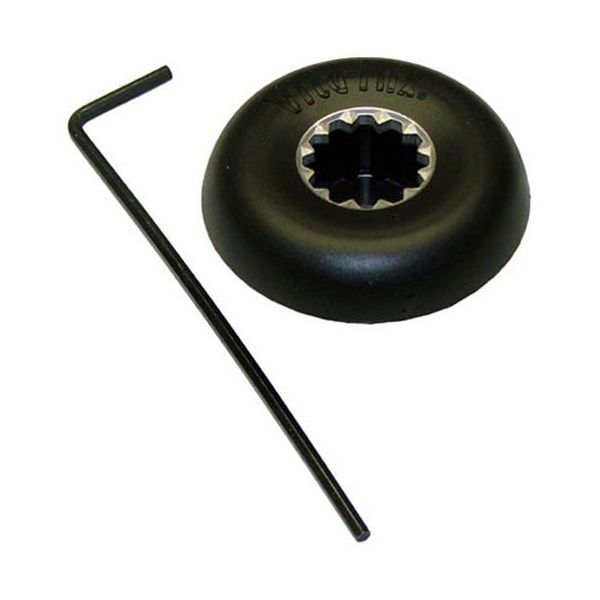
Vita-Mix VM000891 Drive Socket 12-Pin 1-3/4" OD

$18.10
In stock
SKU
VM000891
The Vita-Mix VM000891 Drive Socket 1-3/4" OD is a coupling of the motor rotation to the blade assembly with a 12-pin coupling. The socket is attached to the motor shaft of compatible blender bases and a set screw is used to hold it in place. This internal component is directly connected to the drive system of the blender to ensures the a stable mechanical connection between the motor and blade assembly to facilitate regular blending cycles.

Dimensions

  • Length: 7 In
  • Width: 4.5 In
  • Height: 7 In
  • Weight: 5.579 lbs
https://partsfe.com/media/catalog/product/v/i/vita-mix-vm000891-12-pin-drive-socket-w-set-screw-1-3-4-od-24473.jpg

Product Notes

  • Drive Socket,
  • 1-3/4" Od, 1/4" Sq Hole In Bottom With Set Screw, 12 Pin
  • Spline On Top, Comes With Allen Wrench' Replaces 802.
  • Vita-Mix Blender
VITA-MIX:
Write Your Own Review
You're reviewing:Vita-Mix VM000891 Drive Socket 12-Pin 1-3/4" OD
Your Rating
Customer Questions
What maintenance is required for the Vita-Mix VM000891 12 Pin Drive Socket W/ Set Screw, 1-3/4" OD?

Regularly inspect the drive socket for wear, cracks, or looseness around the set screw. Ensure the set screw remains tight and properly aligned. Clean off debris buildup to maintain smooth operation. Always disconnect power before servicing to prevent injury.

What are common issues with the Vita-Mix VM000891 12 Pin Drive Socket W/ Set Screw, 1-3/4" OD?

  • Worn or stripped drive pins causing poor engagement.
  • Loose or slipping set screw affecting performance.
  • Cracks or damage to the socket body.
  • Misalignment leading to uneven rotation or noise.

We strive to provide our customers with a hassle-free and efficient shopping experience. Our shipping policy ensures the timely delivery of your orders and complete customer satisfaction. View More

We are committed to ensuring your complete satisfaction with every purchase. We understand that circumstances may arise where you must return a product or request a refund. If for any reason you are not satisfied, you may return the item(s) according to the terms outlined below. View More

This Payment Policy outlines the terms and conditions governing all payments made for products purchased through our website. By making a purchase, you agree to be bound by this Payment Policy. View More

Installation Steps

Step1: Unplug blender and allow motor to cool; wear gloves for grip and safety.

Step2: Remove retaining cap or plug to access the drive socket set screw.

Step3: Loosen set screw with an Allen key while holding the shaft steady.

Step4: Unscrew old socket counterclockwise and clean shaft threads thoroughly.

Step5: Thread new socket on, align correctly, and tighten set screw firmly.

Step6: Reinstall cap, restore power, and run briefly to confirm smooth, secure operation.