Garland 227198 Oven Pilot NAT/LP

Special Price $29.55 Regular Price $58.65
In stock
SKU
227198
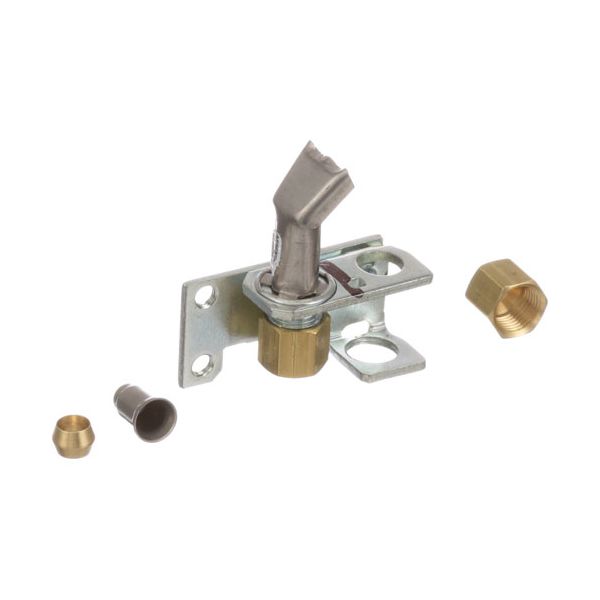
Garland 227198 Pilot NAT/LP is a burner assembly that can be used on a natural gas or liquid propane commercial oven. This is where the light is provided to ignite the main burner in case there is a heat requirement. It is installed in the burner compartment of the oven and is linked to the gas supply system, and it works together with the safety valve and thermostat controls. Pilot assembly is widely applied in restaurant and institutional kitchen settings to provide consistent burner operation, dependable ignition, and consistent heating in the oven system.

Dimensions

  • Length: 2 In
  • Width: 2 In
  • Height: 0.75 In
  • Weight: 0.2 lbs
https://partsfe.com/media/catalog/product/g/a/garland-227198-nat-lp-oven-pilot-54455-2.jpg

Product Notes

  • Nat/Lp Pilot, Factory # 2Ch-10, 1830-115, 1830-500,
  • Tube Size 3/16" & 1/4", Flame Pattern Right
  • Garland Oven Series: Bco, Eco, G48P, G2000, Ico.
  • Southbend Oven 321D After 1982 (1982 & Prior Use Oem #
  • 1164282).Series: 136 & 142 W/Suffix C Or D But W/O Co
  • Prefix, 300 W/F Suffix.
  • Us Range Oven Series: Performer Ii (Right Side) W/Standing
  • Pilot.(Units W/Electronic Pilot Use M-214)
  • Vulcan Hart Oven 260L-77R, 319A-77R, 399A-77R, Series: Eg,
  • Vg.Sg-60L-77R, Sg-260L-77R.24L, 48L, 481L/Lc, 148L/Lc,
  • 36L/Lc, 60L/Lc/Lcc 160L/Lc, 260L/Lc/Lcc
  • Wolf Model?
More Information
Disable SaleableNo
Write Your Own Review
You're reviewing:Garland 227198 Oven Pilot NAT/LP
Your Rating
Customer Questions
What maintenance is required for the Garland 227198 Pilot?

Inspect the pilot regularly to ensure a steady flame and clean the tip to remove soot or residue. Check gas connections for leaks and proper positioning. Routine care supports accurate ignition and secure oven operation.

What are common issues with the Garland 227198 Pilot?

  • Weak or inconsistent pilot flame affecting ignition performance.
  • Pilot going out unexpectedly during operation cycles.
  • Clogged pilot orifice restricting proper gas flow.
  • Delayed ignition response causing startup issues.
  • Gas flow interruptions leading to unstable flames.

We strive to provide our customers with a hassle-free and efficient shopping experience. Our shipping policy ensures the timely delivery of your orders and complete customer satisfaction. View More

We are committed to ensuring your complete satisfaction with every purchase. We understand that circumstances may arise where you must return a product or request a refund. If for any reason you are not satisfied, you may return the item(s) according to the terms outlined below. View More

This Payment Policy outlines the terms and conditions governing all payments made for products purchased through our website. By making a purchase, you agree to be bound by this Payment Policy. View More

Installation Steps

Step1: Turn off the gas supply completely.

Step2: Remove the old oven pilot assembly and clean the mounting area.

Step3: Install the new pilot in the same location and secure mounting hardware.

Step4: Reconnect the gas line and any wiring as originally configured.

Step5: Slowly restore gas supply and test ignition.

Step6: Ensure proper ventilation and avoid open flames during installation.