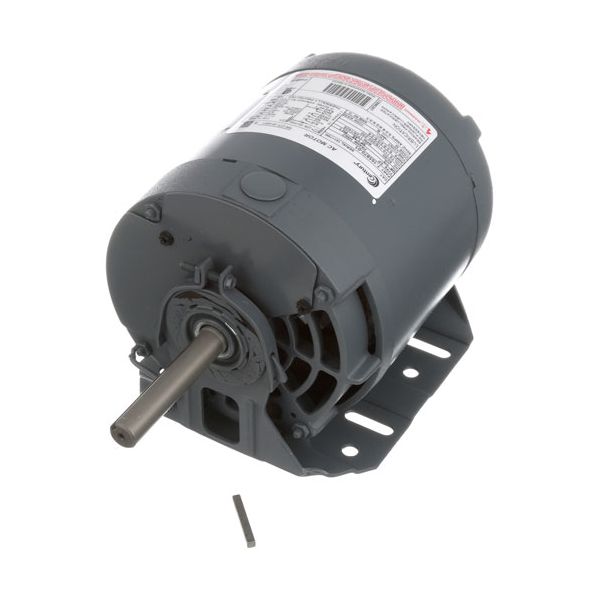
Blodgett BL5603 Oven CW Single Phase Induction Motor, 1/3 HP, 115/230V

Special Price $624.15 Regular Price $964.94
In stock
SKU
BL5603
High Quality Blodgett BL5603 CW Single Phase Induction Motor is most appropriate for usage in commercial ovens like the DFG 100, 200, and 300 series. It can operate on 115 or 230 volts and features a 1/3 HP motor with an RPM of 1725 or 1425. For greater installation flexibility, its clockwise rotating motor may be readily converted to a counterclockwise rotation by switching the red and black wires. With its current specification of 5.1-5.2/2.6-2.6A, the model is both energy efficient and adaptable to a variety of commercial kitchen operations.

Dimensions

  • Length: 12.875 In
  • Width: 10 In
  • Height: 10.5 In
  • Weight: 23 lbs
https://partsfe.com/media/catalog/product/b/l/blodgett-bl5603-oven-cw-single-phase-induction-motor-1-3-hp-115-230v-89379-2.jpg

Product Notes

  • Century Motor
  • [ 100-115/200-230V, ] [ 1/3Hp, ] [1P ] [1725/1425 RPM]
  • [5.1-5.2/2.6-2.6A ] [Cw Rotation Looking From The Shaft
  • Side]
  • Motor Direction Can Be Changed By Interchanging
  • Red And Black Leads . Refer To Data Plate On Motor
  • And Instructions Included With The Motor.
  • Oven Dfg 100, Dfg 200, Dfg 300.
  • Series: Ef/Eze, Fa/Gzl, Mark V, Re, Zephaire E & G
  • (Some Eze Units Require Dual Speed Motor).
  • 2 Spd Motor Dfg100/200 Oem # 32291, # 68-1058
Write Your Own Review
You're reviewing:Blodgett BL5603 Oven CW Single Phase Induction Motor, 1/3 HP, 115/230V
Your Rating
Customer Questions
What maintenance is required for the Blodgett BL5603 Induction Motor?

Inspect motor wiring and terminals regularly and ensure tight connections. Keep the motor housing clean and free from dust to prevent overheating. Lubricate bearings if applicable and ensure proper ventilation during operation.

What are common issues with the Blodgett BL5603 Induction Motor?

  • Vibration or noise from worn bearings.
  • Electrical failure from loose or damaged wiring.
  • Inconsistent motor speed or start failure due to capacitor issues.
  • Overheating due to dust buildup or poor ventilation.

We strive to provide our customers with a hassle-free and efficient shopping experience. Our shipping policy ensures the timely delivery of your orders and complete customer satisfaction. View More

We are committed to ensuring your complete satisfaction with every purchase. We understand that circumstances may arise where you must return a product or request a refund. If for any reason you are not satisfied, you may return the item(s) according to the terms outlined below. View More

This Payment Policy outlines the terms and conditions governing all payments made for products purchased through our website. By making a purchase, you agree to be bound by this Payment Policy. View More

Installation Steps

Step1: Disconnect power supply and allow the oven to cool completely.

Step2: Remove access panel to locate the existing motor.

Step3: Label and disconnect wiring, then unbolt and remove the old motor.

Step4: Position the new motor and secure it with mounting hardware.

Step5: Reconnect wiring as labeled.

Step6: Reassemble panel, restore power, and test operation.

Step7: Ensure proper grounding and avoid contact with live wires.