Groen CROWN-4-TB05 Bezel 2"

Special Price $14.32 Regular Price $24.33
In stock
SKU
CROWN-4-TB05
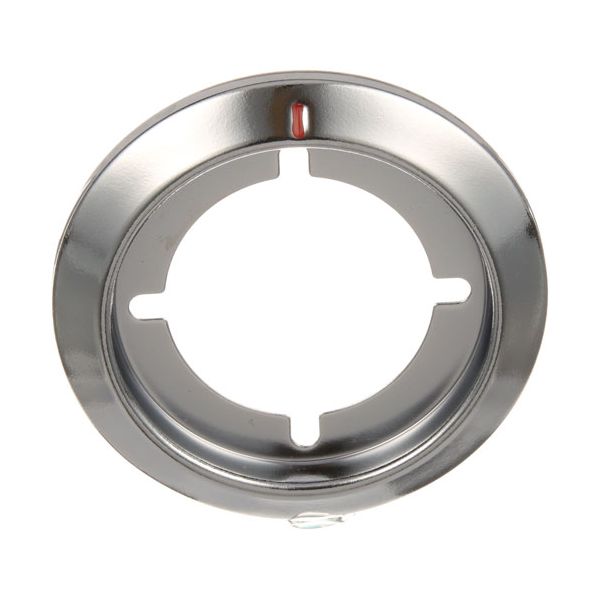
The Groen CROWN-4-TB05 Bezel 2" is a trim-ring part that encloses and completes the aperture of a control knob, switch or indicator on a commercial cooking appliance. The 2" bezel fits on the front of a control panel and fits into the cutout, holding the control equipment and giving a clean finished edge. It connects to the panel and the housing of the mounted control to assist in keeping internal components in place and shielding them against debris and damage. In the control assembly, it assists in user interface integrity and appearance.

Dimensions

  • Length: 2.75 In
  • Width: 2.75 In
  • Height: 0.375 In
  • Weight: 0.1 lbs
https://partsfe.com/media/catalog/product/g/r/groen-crown-4-tb05-bezel-38562-2.jpg

Product Notes

  • Bezel For Robertshaw 2 Pole Electric Thermostat
  • Knobs. 1.5" Id X 2.75" Od.
  • For 4 Pole ( D1/D18} Electric Thermostats Use # 26-4088
  • Tri-Star
ACCUTEMP:
AMERICAN RANGE:
BLODGETT:
CROWN STEAM:
DOYON:
IMPERIAL:
MARKET FORGE:
SOUTHBEND:
TRI-STAR:
U-LINE:
40-931
Write Your Own Review
You're reviewing:Groen CROWN-4-TB05 Bezel 2"
Your Rating
Customer Questions
What maintenance is required for the Groen CROWN-4-TB05 Bezel?

Regularly inspect the bezel for cracks, warping, or loose mounting. Clean it with a mild, non-abrasive cleaner to prevent buildup. Ensure it is securely fitted to avoid misalignment. Always handle carefully during maintenance to prevent damage or injury.

What are common issues with the Groen CROWN-4-TB05 Bezel?

  • Cracking or chipping from impact or stress.
  • Warping due to high heat exposure.
  • Loose fitting or improper alignment.
  • Surface discoloration or wear over time.
  • Difficulty securing properly to equipment.

We strive to provide our customers with a hassle-free and efficient shopping experience. Our shipping policy ensures the timely delivery of your orders and complete customer satisfaction. View More

We are committed to ensuring your complete satisfaction with every purchase. We understand that circumstances may arise where you must return a product or request a refund. If for any reason you are not satisfied, you may return the item(s) according to the terms outlined below. View More

This Payment Policy outlines the terms and conditions governing all payments made for products purchased through our website. By making a purchase, you agree to be bound by this Payment Policy. View More

Installation Steps

Step1: Turn off power to the equipment and ensure the unit is cool before starting installation.

Step2: Remove existing bezel or cover by unscrewing fasteners and carefully detaching it from the mounting surface.

Step3: Align the new bezel with the panel opening ensuring correct orientation and fit.

Step4: Secure the bezel using original screws tighten evenly then restore power and test for proper fit.