Turbochef ENC-3050 Oven Door Switch Assembly

Special Price $151.08 Regular Price $232.79
In stock
SKU
ENC-3050
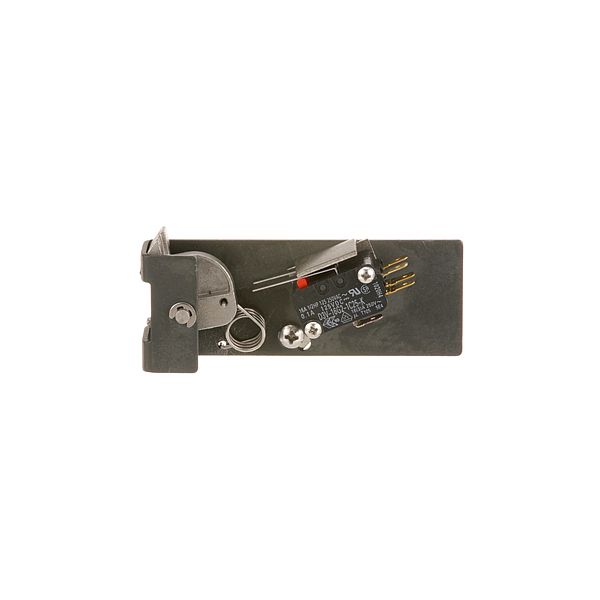
The TurboChef ENC-3050 Oven Door Switch Assembly serves as a fundamental safety and operational enhancement for NGC, NGC2, NGO, and Sota convection and microwave oven models. The assembly includes a primary door switch with two microswitches in its bracket which ensures dependable operation through preventing Open Door errors while protecting against fuse problems. The assembly's distinctive design moves the secondary switch to enhance timing precision between door openings thus reducing the potential for operational failures caused by improper switch sequence. The ENC-3050 operates as an component which delivers peak performance alongside extended operational durability for your oven system.

Dimensions

  • Length: 6.5 In
  • Width: 5 In
  • Height: 2 In
  • Weight: 0.47 lbs
https://partsfe.com/media/catalog/product/t/u/turbochef-enc-3050-oven-door-switch-assembly-66843-2.jpg

Product Notes

  • Primary Door Switch,
  • Bracket With Two Microswitches
  • Tubochef Convection & Microwave Oven: Ngc, Ngc2, Ngo/Sota
Write Your Own Review
You're reviewing:Turbochef ENC-3050 Oven Door Switch Assembly
Your Rating
Customer Questions
What maintenance is required for the Turbochef ENC-3050 Door Switch Assembly?

Regularly inspect the door switch for wear, debris, or loose connections. Clean contacts with a soft, dry cloth to ensure proper operation. Test the switch periodically to confirm the oven starts and stops safely. Prevent moisture exposure to avoid electrical issues.

What are common issues with the Turbochef ENC-3050 Door Switch Assembly?

  • Oven failing to start due to switch malfunction
  • Inconsistent door detection
  • Electrical contact wear causing intermittent operation
  • Switch sticking or becoming unresponsive.

We strive to provide our customers with a hassle-free and efficient shopping experience. Our shipping policy ensures the timely delivery of your orders and complete customer satisfaction. View More

We are committed to ensuring your complete satisfaction with every purchase. We understand that circumstances may arise where you must return a product or request a refund. If for any reason you are not satisfied, you may return the item(s) according to the terms outlined below. View More

This Payment Policy outlines the terms and conditions governing all payments made for products purchased through our website. By making a purchase, you agree to be bound by this Payment Policy. View More

Installation Steps

Step1: Power off the oven and unplug it before starting.

Step2: Open the oven door and locate the existing door switch assembly.

Step3: Disconnect wires carefully from the old switch, noting their positions.

Step4: Remove the old switch by unscrewing its mounting screws.

Step5: Position the new switch in place and secure it with screws.

Step6: Reconnect the wires to the correct terminals.

Step7: Test the door operation and oven functionality.