Blodgett 7873 Oven Hinge Pin Screw Assembly

Special Price $41.54 Regular Price $69.01
In stock
SKU
7873
Manufacturer:
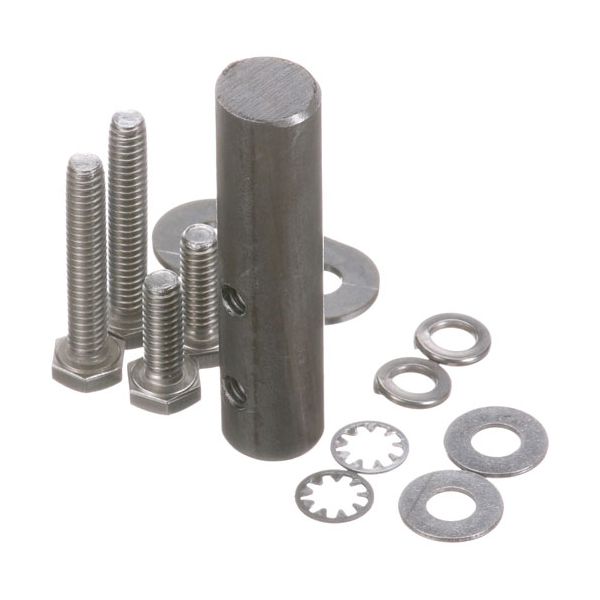
The Blodgett 7873 Oven Hinge Pin Screw Assembly is a replacement part that ensures the hinge pin fits firmly in place so that the door does not move during use. It goes into the hinge bracket and secures the pin in place in its slot. The screw is placed at the point of connection of the hinge. The pin and the door are held in line with the oven frame by their positions. The assembly is made in such a way that it does not disrupt the other hinge elements, preserving the motion of the door whilst retaining pivot elements.

Dimensions

  • Length: 2.25 In
  • Width: 2.75 In
  • Height: 1 In
  • Weight: 0.318 lbs
https://partsfe.com/media/catalog/product/b/l/blodgett-7873-hinge-pin-11300-2.jpg

Product Notes

  • Hinge Pin Assembly
  • 2-11/16 X 5/8 W/ 2 Ea 1-1/2 X 1/4-20 Hex Bolts,
  • 2Ea Internal Star Washers, 2Ea3/4 X 1/4-20 Hex Bolts,
  • 2Ea 1/4 Flat Washer, 2Ea 1/4 Lock Washer
  • Blodgett Kco-25E, Ctb After 9/86
BLODGETT:
Write Your Own Review
You're reviewing:Blodgett 7873 Oven Hinge Pin Screw Assembly
Your Rating
Customer Questions
What maintenance is required for the Blodgett 7873 Hinge Pin?

Inspect the hinge pin regularly for damage, bending, or corrosion. Keep the hinge assembly clean and free of grease buildup or debris. Apply food-safe lubricant to reduce friction and ensure smooth door movement. Proper alignment checks prevents binding and ensure safe operation.

What are common issues with the Blodgett 7873 Hinge Pin?

  • Damage on the pin surface causing looseness in the door assembly.
  • Rust or corrosion leading to restricted movement or sticking.
  • Misalignment resulting in uneven door closing or binding.
  • Pin bending or deformation under repeated heavy usage.

We strive to provide our customers with a hassle-free and efficient shopping experience. Our shipping policy ensures the timely delivery of your orders and complete customer satisfaction. View More

We are committed to ensuring your complete satisfaction with every purchase. We understand that circumstances may arise where you must return a product or request a refund. If for any reason you are not satisfied, you may return the item(s) according to the terms outlined below. View More

This Payment Policy outlines the terms and conditions governing all payments made for products purchased through our website. By making a purchase, you agree to be bound by this Payment Policy. View More

Installation Steps

Step1: Turn off oven power and allow the door to cool completely.

Step2: Support the oven door to prevent sudden movement.

Step3: Remove the worn or damaged hinge pin from the hinge assembly.

Step4: Align the hinge holes on the door and frame.

Step5: Insert the new hinge pin fully into place.

Step6: Verify smooth door movement and secure fit before use.