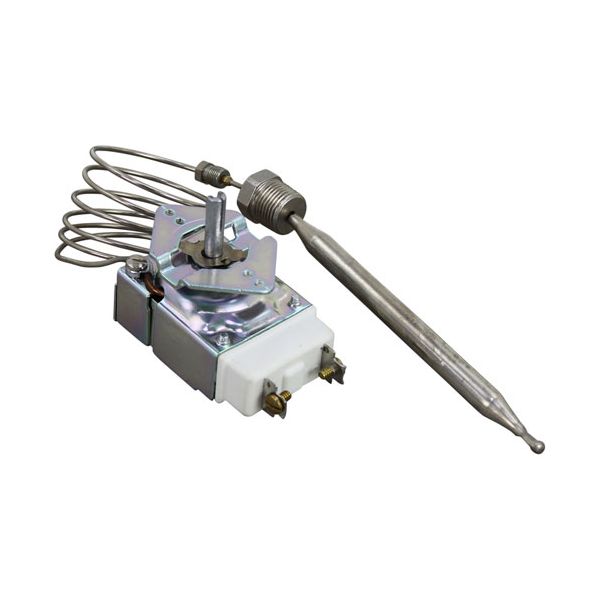
Cecilware L345AL Fryer Thermostat RX W/ 3/8" Bulb 200-375°F

Special Price $223.81 Regular Price $344.85
In stock
SKU
L345AL
The Cecilware L345AL Thermostat RX is used for temperature control in fryers and it operates between 200 to 375 Degrees Fahrenheit. It comes with a 3/8” bulb and 5-3/4” cap and has a 36” capillary tube for convenience. The thermostat can be used with EFP, EFS, FMP, and FMS series fryers and also with Star fryers.. It features a 3/8" bulb with a 5-3/4" cap and a 36" capillary tube for easy installation. The thermostat is compatible with various fryer models, including EFP, EFS, FMP, and FMS series, as well as Star fryers.

Dimensions

  • Length: 7 In
  • Width: 2 In
  • Height: 2.5 In
  • Weight: 0.8 lbs
https://partsfe.com/media/catalog/product/c/e/cecilware-l345al-fryer-thermostat-rx-w-3-8-bulb-200-375-f-75871.jpg

Product Notes

  • [ Type - Rx ] [ Temp 200-375 ] [ Bulb 3/8" X 5-3/4" ]
  • Cap 36" ][ 3/8" Mpt Stuff Box][ Mount 11 ]
  • Cecilware Dial # 22-1192 Red T'Stat Knob,
  • [ 2-1/4" Dia ] [ - 375-225 ] [Mount .187" ] [Flat Up]
  • [Gen Use Dial # 221006 ] Black & Silver T'Stat
  • Knob [ 2" Dia ] [ Off-400-200] [Mount .187"] [ 4 Way]
  • Cecilware Fryer Efp(30,40,65), Efs(30,40,65).
  • Fmp(30,40,40B,40Bss,65,403),
  • Fms(30,40,54,65).
  • ** For Old Kx Sytle See G711, E-268, # 461332
  • Star 404D, 615Fd, 630Fd
GRINDMASTER:
STAR MFG:
U-LINE:
5300-406, 5300-40F, RX6-36
Write Your Own Review
You're reviewing:Cecilware L345AL Fryer Thermostat RX W/ 3/8" Bulb 200-375°F
Your Rating
Customer Questions
What maintenance is required for the Cecilware L345AL Thermostat Bulb?

Regularly inspect the thermostat bulb and capillary for kinks or damage that could affect temperature sensing. Keep connections tight and free from grease buildup. Verify calibration periodically with a reliable thermometer. Always disconnect power before servicing to ensure safe handling.

What are common issues with the Cecilware L345AL Thermostat Bulb?

  • Inaccurate temperature readings causing overheating or underheating.
  • Delayed burner response due to capillary damage.
  • Thermostat failing to cycle properly during operation.
  • Loose electrical terminals leading to intermittent control issues.

We strive to provide our customers with a hassle-free and efficient shopping experience. Our shipping policy ensures the timely delivery of your orders and complete customer satisfaction. View More

We are committed to ensuring your complete satisfaction with every purchase. We understand that circumstances may arise where you must return a product or request a refund. If for any reason you are not satisfied, you may return the item(s) according to the terms outlined below. View More

This Payment Policy outlines the terms and conditions governing all payments made for products purchased through our website. By making a purchase, you agree to be bound by this Payment Policy. View More

Installation Steps

Step1: Disconnect power and allow fryer to cool completely before starting to avoid burns or shock.

Step2: Remove control panel and carefully disconnect old thermostat wiring noting connections.

Step3: Insert bulb into fryer well ensuring correct placement and secure mounting bracket.

Step4: Reconnect wiring terminals to matching points on new thermostat.

Step5: Reassemble panel and restore power then test temperature control for proper operation.