Vulcan Hart 00-410838-000G1 Fryer Adapter Wire Assembly 18" Wire Leads

Special Price $18.41 Regular Price $31.25
In stock
SKU
00-410838-000G1
Manufacturer:
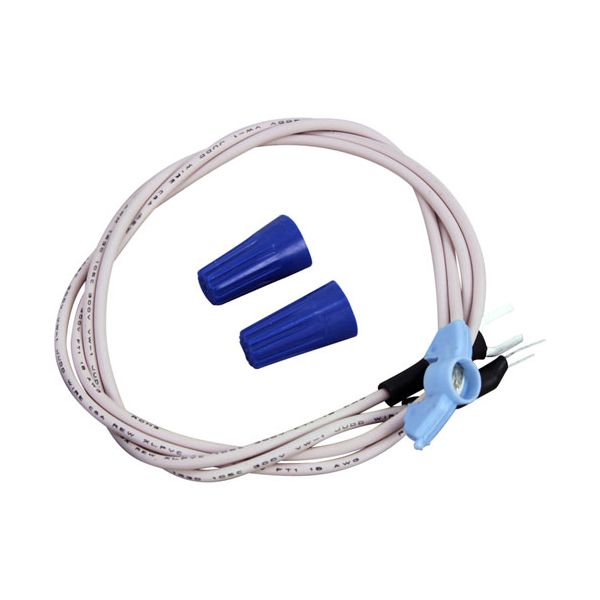
The Vulcan Hart 00-410838-000G1 Fryer Adapter Wire Assembly is an electrical connection part that is used to connect the control and safety circuits on a compatible appliance. It has 18" wire leads that allow the required reach to make the routing of internal components secure. The assembly is installed as a part of the wiring system to provide a steady signal and power flow to coordinate the work. In the commercial frying setting, it facilitates communication between controls and protective systems and assists in maintaining the operation of the appliance and ensuring safe operation.

Dimensions

  • Length: 3 In
  • Width: 0.5 In
  • Height: 2.5 In
  • Weight: 0.1 lbs
https://partsfe.com/media/catalog/product/v/u/vulcan-hart-00-410838-000g1-hi-limit-adapter-w-18-wire-leads-2-screw-term-lugs-35866-2.jpg

Product Notes

  • Hi-Limit Adaptor, 18" Wire Leads W/ 2 Screw Term Lugs
  • Anets Model?
  • Cecilware Fryer Fm28, Fm28A, Gf8, Gf10, Gf16, Gf16A, Gf28,
  • Gf28A.
  • Frymaster Fryer Mac(50,51,150,151,250,251,350,351), Mj41,
  • Mj41E, Mj45E, Mjcf, Mjcfe, All Computer Magic Ii & Iii.
  • Garland Fryer
  • Pitco Fryer All Gas Fryers W/Lch High Limit.
  • Rethermalizer Rtg14, Rtg14 (Taco Bell).
  • Southbend Fryer Model?
  • Vulcan Fryer 7891E, 7891G, 7892E, 7892G,Hf91E,
  • Hf91G, Hf92E, Hf92G.
  • Wolf Model Wtf-35, Wtf-42
Write Your Own Review
You're reviewing:Vulcan Hart 00-410838-000G1 Fryer Adapter Wire Assembly 18" Wire Leads
Your Rating
Customer Questions
What maintenance is required for the Vulcan Hart 00-410838-000G1 Hi-Limit Adapter?

Inspect wiring connections and leads regularly for damage or loosening. Keep screw terminals tight and free from corrosion. Ensure the adapter remains clean and dry to prevent overheating. Always disconnect power before servicing for safety.

What are common issues with the Vulcan Hart 00-410838-000G1 Hi-Limit Adapter?

  • Loose or corroded screw terminals causing intermittent power loss.
  • Damaged or frayed leads leading to signal interruption.
  • Hi-limit false tripping due to heat buildup or poor contact.
  • Overheating from poor connection or restricted airflow around adapter.

We strive to provide our customers with a hassle-free and efficient shopping experience. Our shipping policy ensures the timely delivery of your orders and complete customer satisfaction. View More

We are committed to ensuring your complete satisfaction with every purchase. We understand that circumstances may arise where you must return a product or request a refund. If for any reason you are not satisfied, you may return the item(s) according to the terms outlined below. View More

This Payment Policy outlines the terms and conditions governing all payments made for products purchased through our website. By making a purchase, you agree to be bound by this Payment Policy. View More

Installation Steps

Step1: Disconnect power at breaker and verify zero voltage with a meter.

Step2: Remove access panel and note existing hi-limit wiring configuration for accurate reconnection.

Step3: Detach old adapter by loosening screw terminals carefully and retain hardware if reusable.

Step4: Connect leads to matching terminals, ensuring firm seating and correct polarity.

Step5: Secure adapter using screw lugs and check alignment, tightening to torque.

Step6: Reassemble panel and restore power.