Blodgett 35702 Oven SPST Door Micro Switch Kit 2 Holes 1 Oc

Special Price $103.33 Regular Price $203.66
In stock
SKU
35702
Manufacturer:
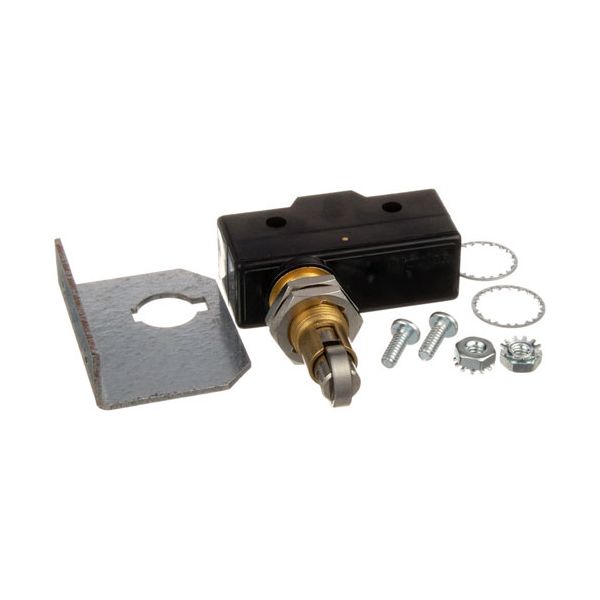
The Blodgett 35702 Oven Door Micro Switch Kit w/Hardware sense the position of the oven door and transmit an electrical signal to activate heating functions based on the position of the oven door. It ensure that the heating elements are turned on or turned off according to whether the door is open or closed, so that the operational control is appropriate. This micro switch kit is mounted close to the oven door mechanism, and it is part of the control circuit to accurately detect the door movement and to make the system respond accordingly.

Dimensions

  • Length: 5 In
  • Width: 2.75 In
  • Height: 0.875 In
  • Weight: 0.18 lbs
https://partsfe.com/media/catalog/product/b/l/blodgett-35702-oven-spst-door-micro-switch-kit-2-holes-1-oc-91441-2.jpg

Product Notes

  • Door Micro Switch W/ Bracket
  • [ Push Button W/Roller ] [ Fits Hole 2 Holes, 1" Ctrs ]
  • [ No ] [ Spst ]
  • [ Stem Has Double Flats ], 3/4Hp - 125V, 1.5Hp - 250V
  • Includes 2 Mounting Screws.
  • Blodgett
  • Oven Mark V (Between 7/84 And 8/31/00), Zephaire E & G
  • (Before 8/31/00), Dfg 100,200 After 07/84.
Write Your Own Review
You're reviewing:Blodgett 35702 Oven SPST Door Micro Switch Kit 2 Holes 1 Oc
Your Rating
Customer Questions
What maintenance is required for the Blodgett 35702 Door Micro Switch Kit?

Regularly check the oven door micro switch for proper operation and ensure it actuates smoothly when the oven door is opened or closed. Keep the switch area clean of grease, crumbs, or debris that can prevent contact. Verify wiring connections remain tight and replace the switch if intermittent faults occur.

What are common issues with the Blodgett 35702 Door Micro Switch Kit?

  • Switch failing to detect door open/close status.
  • Intermittent contact due to worn internal contacts.
  • Loose wiring connections are affecting the signal.
  • Switch sticking or failing to reset properly.

We strive to provide our customers with a hassle-free and efficient shopping experience. Our shipping policy ensures the timely delivery of your orders and complete customer satisfaction. View More

We are committed to ensuring your complete satisfaction with every purchase. We understand that circumstances may arise where you must return a product or request a refund. If for any reason you are not satisfied, you may return the item(s) according to the terms outlined below. View More

This Payment Policy outlines the terms and conditions governing all payments made for products purchased through our website. By making a purchase, you agree to be bound by this Payment Policy. View More

Installation Steps

Step1: Turn off and unplug the oven to ensure safety.

Step2: Access the door switch area by removing the control or front panel.

Step3: Disconnect wires from the existing micro switch carefully.

Step4: Remove mounting screws and take out the old switch.

Step5: Install the new switch and secure it with the hardware.

Step6: Reconnect wiring, reassemble panels, restore power, and test door operation.