Southbend 1008757 Range Orifice Hood LP #57

$4.32
In stock
SKU
1008757
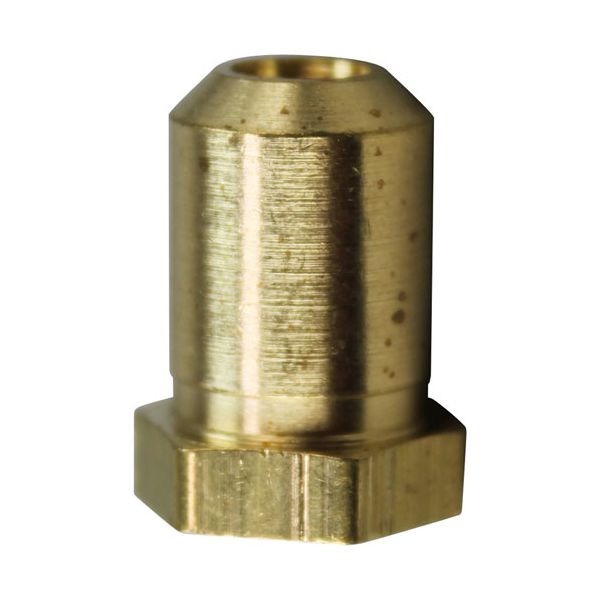
The Southbend 1008757 Range Orifice Hood LP #57 High gas flow to commercial burners, to provide proper combustion and maintain constant flame output. It works by forcing fuel into a precision-sized hole under the brass hood into the burner ports. It is an essential element of the gas delivery system of the appliance that assists to ensure safe ignition and stable cooking. The opening assists in ensuring the steady running of the burner and the rest of the appliances in their usual operation.

Dimensions

  • Length: 0.75 In
  • Width: 0.25 In
  • Height: 0.75 In
  • Weight: 0.01 lbs
https://partsfe.com/media/catalog/product/s/o/southbend-1008757-brass-hood-orifice-57-3-8-27-x-1-2-high-74415-2.jpg

Product Notes

  • Brass Hood Orifice,
  • 3/8"-27 X 1/2" High X #57 (Nat)
  • For Lp Hood Orifice Use # 26-1080 #72 (Lp)
  • Garland
Write Your Own Review
You're reviewing:Southbend 1008757 Range Orifice Hood LP #57
Your Rating
Customer Questions
What is the Best Electric Griddle?

Electric Griddle is an electronic equipment that uses an electric element as its heat source. It has a large cooking surface often made up of nonstick material. Electric Griddle has a surface which you do not find in the regular stovetop cookware. ...

What maintenance is required for the Southbend 1008757 Hood Orifice?

Clean the orifice regularly to prevent clogging from grease and carbon deposits. Inspect threading and seating for damage or leaks. Always disconnect gas before servicing and ensure proper tightening to maintain consistent airflow and better burner performance.

What are common issues with the Southbend 1008757 Hood Orifice?

  • Clogging from grease buildup reducing gas flow.
  • Uneven flame or weak burner performance.
  • Thread wear causing poor sealing or leaks.
  • Incorrect calibration leading to inefficient combustion.
  • Corrosion or debris affecting gas delivery consistency.

We strive to provide our customers with a hassle-free and efficient shopping experience. Our shipping policy ensures the timely delivery of your orders and complete customer satisfaction. View More

We are committed to ensuring your complete satisfaction with every purchase. We understand that circumstances may arise where you must return a product or request a refund. If for any reason you are not satisfied, you may return the item(s) according to the terms outlined below. View More

This Payment Policy outlines the terms and conditions governing all payments made for products purchased through our website. By making a purchase, you agree to be bound by this Payment Policy. View More

Installation Steps

Step1: Turn off gas supply and power and let unit cool completely for safety.

Step2: Remove hood orifice/access panel and secure area.

Step3: Unscrew existing orifice with proper tool.

Step4: Inspect threads and clean debris before installation.

Step5: Install new orifice, hand-tight then snug, ensure proper fit.

Step6: Reassemble components and ensure alignment before closing unit.

Step7: Restore gas, test ignition, check leaks with soapy water for gas safety.