Bakers Pride R3023X Charbroiler Burner Orifice #72 3/8"-27 X 1/2"

$6.02
Out of stock
SKU
R3023X
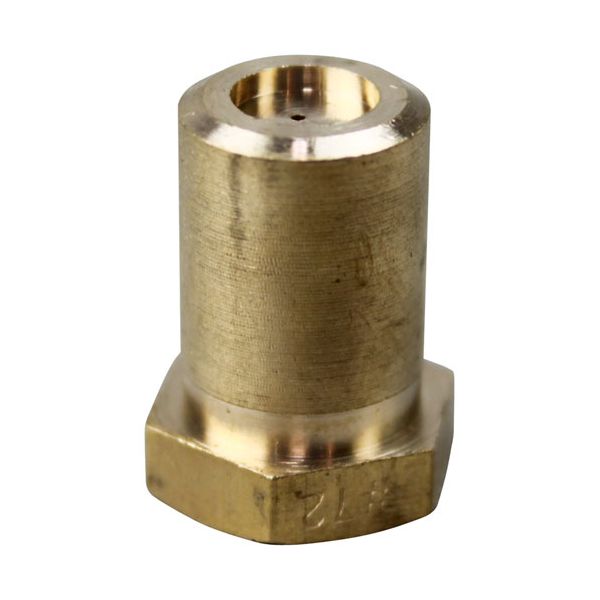
The Bakers Pride R3023X CharBroiler Burner Orifice #72 is used to measure the flow rate of gas to a burner by providing a precisely sized orifice that limits the fuel prior to entering the combustion chamber to help determine the correct size of flame and combustion properties in that application. It is fitted in the gas train at the burner assembly of compatible cooking equipment where the 3/8"-27 inlet and 1/2 in. height specification coincide. This burner orifice is used in commercial ranges and ovens that are configured and designed to that size.

Dimensions

  • Length: 0.75 In
  • Width: 0.5 In
  • Height: 0.75 In
  • Weight: 0.02 lbs
https://partsfe.com/media/catalog/product/b/a/bakers-pride-r3023x-brass-hood-orifice-3-8-27-x-1-2-76949.jpg

Product Notes

  • Brass Hood Orifice,
  • 3/8"-27 X 1/2" High X #72, (Lp)
  • Can Be Drilled Out For Other Size.
  • Suggest #56 To #53 For Natural Gas.
  • Royal Range
BAKERS PRIDE:
ROYAL RANGE:
1122-72, ROY1122-72
SOUTHBEND:
Write Your Own Review
You're reviewing:Bakers Pride R3023X Charbroiler Burner Orifice #72 3/8"-27 X 1/2"
Your Rating
Customer Questions
What is the Best Electric Griddle?

Electric Griddle is an electronic equipment that uses an electric element as its heat source. It has a large cooking surface often made up of nonstick material. Electric Griddle has a surface which you do not find in the regular stovetop cookware. ...

What maintenance is required for the Bakers Pride R3023X Hood Orifice?

Regularly inspect the orifice for grease, carbon buildup, or blockages and clean it with a soft brush and proper solvent. Ensure proper gas flow and alignment. Check fittings for leaks and tighten connections to maintain safe, efficient burner performance.

What are common issues with the Bakers Pride R3023X Hood Orifice?

  • Clogging from grease or carbon buildup.
  • Uneven flame due to partial blockage.
  • Gas leakage from worn threads or poor fit.
  • Corrosion affecting airflow and efficiency.
  • Reduced heat output from restricted orifice flow.

We strive to provide our customers with a hassle-free and efficient shopping experience. Our shipping policy ensures the timely delivery of your orders and complete customer satisfaction. View More

We are committed to ensuring your complete satisfaction with every purchase. We understand that circumstances may arise where you must return a product or request a refund. If for any reason you are not satisfied, you may return the item(s) according to the terms outlined below. View More

This Payment Policy outlines the terms and conditions governing all payments made for products purchased through our website. By making a purchase, you agree to be bound by this Payment Policy. View More

Installation Steps

Step1: Turn off gas supply and power to appliance for safety.

Step2: Allow unit to cool completely before servicing.

Step3: Remove existing burner/hood assembly to access orifice carefully.

Step4: Unscrew old orifice using proper tool, avoid stripping threads.

Step5: Install new orifice, hand-tighten then secure properly.

Step6: Reassemble burner components and ensure correct alignment.

Step7: Turn on gas and check for leaks and proper flame.