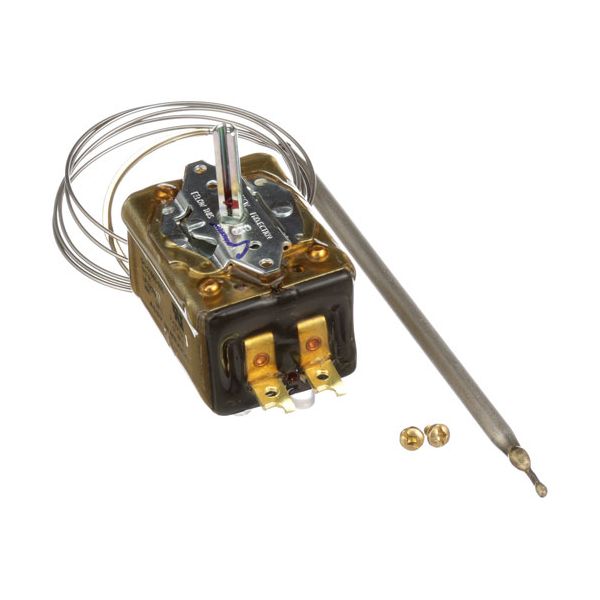
Cleveland KE55069-2 Thermostat

Special Price $198.75 Regular Price $265.95
In stock
SKU
KE55069-2
The Cleveland KE55069-2 Thermostat is a part that controls the internal temperatures by measuring the thermal levels and turning the power on and off to the heating elements to maintain the set point. This is an electromechanical part that makes use of a fluid-filled capillary tube which expands or contracts to cause the internal switch mechanism to operate according to ongoing heat changes. The component is fitted in the operational housing of the equipment and is directly connected to the operator dial and the primary heating circuit.

Dimensions

  • Length: 7.5 In
  • Width: 2 In
  • Height: 3 In
  • Weight: 0.7 lbs
https://partsfe.com/media/catalog/product/c/l/cleveland-ke55069-2-d-stem-flat-right-thermostat-w-1-4-x-6-bulb-37271.jpg

Product Notes

  • [ Ranco Type- G1 ] [ Temp 150-550 ] [ Bulb 1/4" X 6" ]
  • [ Cap 36" ] D-Stem Flat Right
  • [ For Dial Use # 22-1176 ] Pointer Knob
  • [ 1-1/8" Dia ] [ Pointer] [Mount .190" ] [ Flat Right ]
  • Cleveland
  • Skillet F30Gl, F40E-1, Sgl-(T,X), Sgm-(T,X), Set10, Set15.
  • Garland
  • Braising Pan F30E, F30Gl, F40E.
CLEVELAND:
077192-1, 2234600, CLE2234600, CLEKE55069-2, CLESK00028, KE55069-1, KE55069-2, KE550691, KE550692, SK00028
GARLAND:
RANCO:
U-LINE:
G1-11736
Write Your Own Review
You're reviewing:Cleveland KE55069-2 Thermostat
Your Rating
Customer Questions
What maintenance is required for the Cleveland KE55069-2 Thermostat?

Regularly inspect the thermostat for accurate temperature response and ensure the sensing bulb maintains proper contact with the heated surface. Check the capillary tube for kinks or damage and keep it free from grease buildup. Tighten electrical connections securely and verify calibration if needed. Always disconnect power before servicing for safety.

What are common issues with the Cleveland KE55069-2 Thermostat?

  • Inconsistent or inaccurate temperature control.
  • Equipment overheating or failing to heat properly.
  • Damaged or kinked capillary tube affecting sensing.
  • Loose or worn electrical connections.
  • Slow response to temperature changes.
  • Thermostat failing to cycle heating elements correctly.

We strive to provide our customers with a hassle-free and efficient shopping experience. Our shipping policy ensures the timely delivery of your orders and complete customer satisfaction. View More

We are committed to ensuring your complete satisfaction with every purchase. We understand that circumstances may arise where you must return a product or request a refund. If for any reason you are not satisfied, you may return the item(s) according to the terms outlined below. View More

This Payment Policy outlines the terms and conditions governing all payments made for products purchased through our website. By making a purchase, you agree to be bound by this Payment Policy. View More

Installation Steps

Step1: Turn off power/gas and let unit cool, wear gloves, before servicing.

Step2: Remove control panel and locate thermostat and bulb.

Step3: Disconnect wiring noting terminal positions securely.

Step4: Remove old thermostat and mount new unit securely, ensure alignment.

Step5: Insert sensing bulb into proper well, avoid kinks, no strain on capillary.

Step6: Reconnect wiring, restore power, test temperature accuracy and cutoff, check safety cutoff operates.