
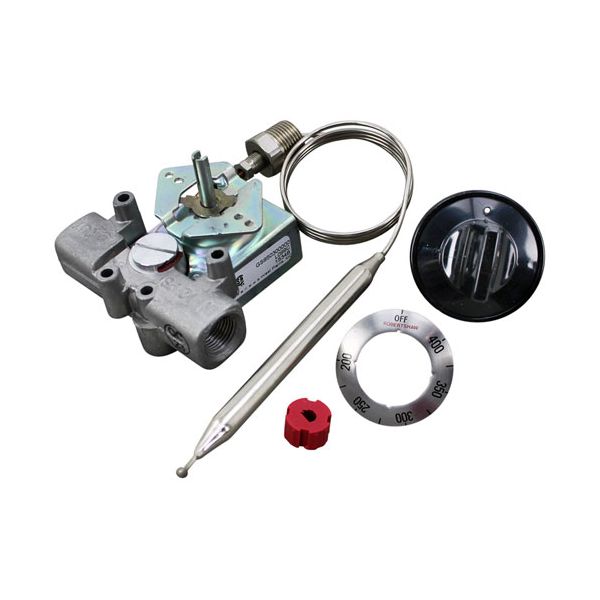
Cecilware L099A 4 Way Mount Thermostat W/ DIAL GS 3/8" X 5-3/8" BULB 30"CAP Gas IN/OUT 3/8" FPT& Stuff Box

Special Price $132.42 Regular Price $249.38
In stock
SKU
L099A
Manufacturer:

The Cecilware L099A Thermostat is used to control the oil temperature of commercial deep fryers. It has a 3/8" x 5-3/8" sensing bulb and 30 inch capillary, which allows it to be used to achieve consistent cooking results by having accurate control of the temperature. This thermostat has an inbuilt dial it can be adjusted by the user and is fitted in several fryer models. It is the main temperature control part that provides safe operation, and optimum frying results in foodservice settings.

Dimensions

  • Length: 6 In
  • Width: 3.25 In
  • Height: 5.5 In
  • Weight: 0.9 lbs
https://partsfe.com/media/catalog/product/c/e/cecilware-l099a-4-way-mount-thermostat-w-dial-gs-3-8-x-5-3-8-bulb-30-cap-gas-in-out-3-8-fpt-stuff-box-11486.jpg

Product Notes

  • [ Type - Gs ] [ Temp 200-400 ] [ Bulb 3/8" X 5-3/8"
  • Cap 30" ] [ Gas In/Out 3/8" Fpt & 3/8" Stuff Box ]
  • [Includes : Thermostat,Dial,Red Insert, Overlay]
  • [ Dial To Use # 22-1006 Off-400-200 ] 4 Way Mount.
  • Or Dial # 22-1027 400-200 ] Flat-Down.
  • Cecilware Dial # 22-1192, (Point-375-225F)
  • Cecilware
  • Fryer Fm(28,28A), Gf(8,10,16,16A,28,28A).
  • Star Fryer 401A, 404.
CECILWARE:
GRINDMASTER:
STAR MFG:
U-LINE:
4290-011, 4290-01A, GS11-030-14, GS110300000
Write Your Own Review
You're reviewing:Cecilware L099A 4 Way Mount Thermostat W/ DIAL GS 3/8" X 5-3/8" BULB 30"CAP Gas IN/OUT 3/8" FPT& Stuff Box
Your Rating
Customer Questions
What maintenance is required for the Cecilware L099A Thermostat With Dial?

Inspect the thermostat dial and sensing bulb regularly for dirt or corrosion and clean gently to ensure accurate readings. Check mounting and gas connections for leaks or looseness. Periodic calibration helps maintain precise temperature control and safe operation.

What are common issues with the Cecilware L099A Thermostat With Dial?

  • Inaccurate temperature readings due to worn sensing bulb.
  • Sticking or unresponsive dial mechanism.
  • Gas control valve communication failure.
  • Loose wiring or connection issues.
  • Calibration drift over time.

We strive to provide our customers with a hassle-free and efficient shopping experience. Our shipping policy ensures the timely delivery of your orders and complete customer satisfaction. View More

We are committed to ensuring your complete satisfaction with every purchase. We understand that circumstances may arise where you must return a product or request a refund. If for any reason you are not satisfied, you may return the item(s) according to the terms outlined below. View More

This Payment Policy outlines the terms and conditions governing all payments made for products purchased through our website. By making a purchase, you agree to be bound by this Payment Policy. View More

Installation Steps

Step1: Turn off gas and electrical power and ensure equipment is fully cool before servicing.

Step2: Remove front panel and disconnect old thermostat wiring and capillary tube carefully.

Step3: Mount the new thermostat securely in the original position.

Step4: Route sensing bulb into the heating chamber without sharp bends or damage.

Step5: Reconnect wiring and gas fittings per the wiring diagram.

Step6: Restore power, then test temperature control and verify stable cycling operation.