American Range A11101 Griddle/Oven Thermostat BJWA

Special Price $209.74 Regular Price $395.00
In stock
SKU
A11101
Manufacturer:
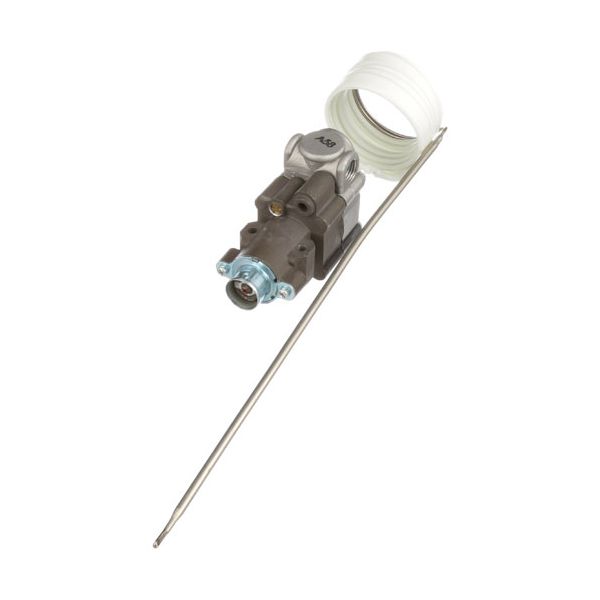
The American Range A11101 Griddle/Oven Thermostat BJWA serves professional kitchens with its temperature control system. The partcontrols thermal levels to produce steady outcomes during cooking. An accurate reliance on thermostats gives chefs complete control over heat levels to improve cooking outcomes as well as operational capabilities. The device's durable design provides dependable performance throughout demanding conditions and its simple installation system reduces operational interruptions. The thermostat achieves both high precision and durability which leads to energy conservation and makes it an excellent solution for improve kitchens with high cooking volume.

Dimensions

  • Length: 11.25 In
  • Width: 4.5 In
  • Height: 4.5 In
  • Weight: 1 lbs
https://partsfe.com/media/catalog/product/a/m/american-range-a11101-griddle-oven-thermostat-bjwa-85757-2.jpg

Product Notes

  • Thermostat-Bjwa, Griddle/Oven, Low-450°F, Rotation - 180°,
  • Outlet Position "B", Outlet Size 1/4" 48" Cap Tube With
  • Fiberglass Sleving. 3/16 X 11" Bulb. W/By-Pass Adjustment.
  • For Knob Use Ap# 22-1393.
  • Fits American Range Models~
  • Ar, Ar-30, Ar-C, Ar-Nv, Ar4C, Arb, Ards, Arg, Arlb, Arlm-1,
  • Arlm-2, Arrg, Arw-36
AMERICAN RANGE:
Write Your Own Review
You're reviewing:American Range A11101 Griddle/Oven Thermostat BJWA
Your Rating
Customer Questions
What maintenance is required for the American Range A11101 Thermostat?

Regularly inspect the griddle thermostat for dust, grease, or debris buildup. Clean gently with a soft, dry cloth and ensure electrical connections are secure. Periodically test temperature accuracy to maintain proper performance and follow safety guidelines when handling power components.

What are the common issues with the American Range A11101 Thermostat?

  • Inaccurate temperature readings.
  • Failure to connect heating or cooling cycles.
  • Loose or corroded wiring connections.
  • Intermittent or inconsistent operation.

We strive to provide our customers with a hassle-free and efficient shopping experience. Our shipping policy ensures the timely delivery of your orders and complete customer satisfaction. View More

We are committed to ensuring your complete satisfaction with every purchase. We understand that circumstances may arise where you must return a product or request a refund. If for any reason you are not satisfied, you may return the item(s) according to the terms outlined below. View More

This Payment Policy outlines the terms and conditions governing all payments made for products purchased through our website. By making a purchase, you agree to be bound by this Payment Policy. View More

Installation Steps

Step1: Turn off and unplug the appliance.

Step2: Remove the old thermostat from its mounting bracket.

Step3: Disconnect wires carefully.

Step4: Inspect the mounting area for corrosion or damage.

Step5: Position the new thermostat in the correct orientation.

Step6: Reconnect the wiring according to the manufacturer's diagram.

Step7: Secure the thermostat with screws or fasteners.

Step8: Power on and test temperature settings for accurate control.