
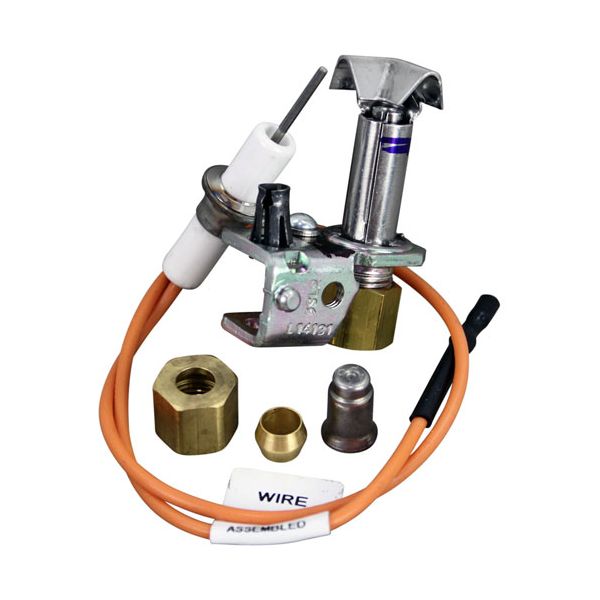
American Range 10413 Range Spark Igniter Pilot Assembly LP/NAT

Special Price $48.51 Regular Price $77.00
In stock
SKU
10413
Manufacturer:

The American Range 10413 Range Spark Igniter Pilot Assembly LP/NAT works by producing a spark that will trigger the gas pilot on the appliance to turn on, so it is able to work as expected. The assembly links straight to the pilot tube and electric system on the oven, with the result that the ignition is always the same whenever the oven is switched on. It can be installed in the oven cavity around the burner, and it is designed to fit in the pilot area, where the gas line and mounting points are placed.

Dimensions

  • Length: 2.5 In
  • Width: 1.5 In
  • Height: 3.5 In
  • Weight: 0.2 lbs
https://partsfe.com/media/catalog/product/a/m/american-range-10413-spark-igniter-oven-pilot-assembly-nat-49547-2.jpg

Product Notes

  • Spark Ign Oven Pilot Nat, Igniter W/12" Wire W/ Round
  • Push On End, 3/16" Cct Nut & Sleeve, Orifice Is .18" Nat
  • Includes Lp Orifice # 26-1554
  • Includes Nat Orifice # 26-1555
  • Use Spark Ignition Module "Sm2", # 44-1009
  • American Range Oven Model?
  • Dynamic Cooking Systems
  • Oven Range - Oven Section.
  • Imperial
  • Oven Series: Ir W/Convection Oven.
AMERICAN RANGE:
10413, A11104, A11132, A11301, AMR10413, AMRA11104
IMPERIAL:
1119, 1120, 1120LP, 1120NAT, IMP1119, IMP1120, IMP1120LP, IMP1120NAT
ROYAL RANGE:
Write Your Own Review
You're reviewing:American Range 10413 Range Spark Igniter Pilot Assembly LP/NAT
Your Rating
Customer Questions
What maintenance is required for the American Range 10413 Spark Igniter Pilot Assembly?

Inspect the igniter and pilot assembly regularly for carbon buildup or debris that may affect ignition performance. Ensure the pilot flame is properly aligned and stable. Clean the assembly gently to avoid damage. Check gas connections for tightness to maintain consistent and safe ignition operation.

What are common issues with the American Range 10413 Spark Igniter Pilot Assembly?

  • Pilot flame failing to ignite.
  • Weak or unstable spark generation.
  • Clogged pilot orifice affecting flow.
  • Delayed burner ignition.
  • Intermittent ignition failure.

We strive to provide our customers with a hassle-free and efficient shopping experience. Our shipping policy ensures the timely delivery of your orders and complete customer satisfaction. View More

We are committed to ensuring your complete satisfaction with every purchase. We understand that circumstances may arise where you must return a product or request a refund. If for any reason you are not satisfied, you may return the item(s) according to the terms outlined below. View More

This Payment Policy outlines the terms and conditions governing all payments made for products purchased through our website. By making a purchase, you agree to be bound by this Payment Policy. View More

Installation Steps

Step1: Turn off gas and electrical supply, allow oven to cool completely, ensure ventilation, and wear protective gloves.

Step2: Remove old pilot assembly, noting wiring and gas connections carefully.

Step3: Position new assembly, align bracket and gas inlet ports.

Step4: Secure screws, reconnect ignition wire and gas line, tighten firmly.

Step5: Restore supply, test spark ignition and flame, check for leaks.

Step6: check stable operation before closing access panel.