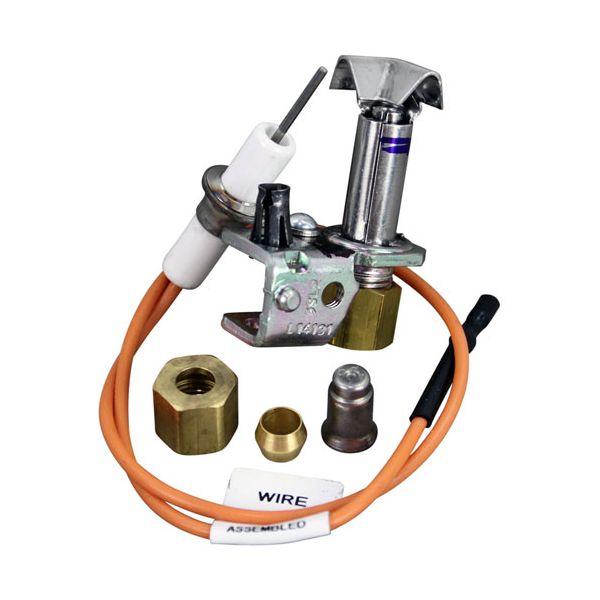
Imperial 1120NAT Oven Spark Igniter Pilot Assembly

Special Price $48.51 Regular Price $77.00
In stock
SKU
1120NAT
Imperial 1120NAT Spark Igniter Pilot Assembly NAT is an essential component is suitable for use in commercial ovens especially in oven ranges with convection ovens. This assembly consists of a 12” wire with round push-on terminal, 3/16” CCT nut and sleeve, natural gas and LP orifices. It operates through creating a spark that will in turn ignite the pilot flame to support safe and efficient lighting in your oven. Designed to work with the SM2 spark ignition module, this product increases dependability, decreases service requirements, and optimizes the oven. Perfect for any commercial kitchen that needs reliable and steady source of ignition.

Dimensions

  • Length: 2.5 In
  • Width: 1.5 In
  • Height: 3.5 In
  • Weight: 0.2 lbs
https://partsfe.com/media/catalog/product/i/m/imperial-1120nat-oven-spark-igniter-pilot-assembly-27898-2.jpg

Product Notes

  • Spark Ign Oven Pilot Nat, Igniter W/12" Wire W/ Round
  • Push On End, 3/16" Cct Nut & Sleeve, Orifice Is .18" Nat
  • Includes Lp Orifice # 26-1554
  • Includes Nat Orifice # 26-1555
  • Use Spark Ignition Module "Sm2", # 44-1009
  • American Range Oven Model?
  • Dynamic Cooking Systems
  • Oven Range - Oven Section.
  • Imperial
  • Oven Series: Ir W/Convection Oven.
AMERICAN RANGE:
10413, A11104, A11132, A11301, AMR10413, AMRA11104
IMPERIAL:
1119, 1120, 1120LP, 1120NAT, IMP1119, IMP1120, IMP1120LP, IMP1120NAT
ROYAL RANGE:
Write Your Own Review
You're reviewing:Imperial 1120NAT Oven Spark Igniter Pilot Assembly
Your Rating
Customer Questions
What maintenance is required for the Imperial 1120NAT Spark Igniter Pilot Assembly?

Regularly clean the igniter electrode and pilot assembly to remove carbon buildup and debris. Inspect wiring connections for looseness or corrosion. Ensure proper gas flow and alignment. Prevent moisture exposure and always disconnect power before servicing for safety.

What are common issues with the Imperial 1120NAT Spark Igniter Pilot Assembly?

  • Weak or intermittent pilot flame.
  • Carbon buildup on electrode.
  • Loose or damaged wiring connections.
  • Delayed ignition or no ignition.

We strive to provide our customers with a hassle-free and efficient shopping experience. Our shipping policy ensures the timely delivery of your orders and complete customer satisfaction. View More

We are committed to ensuring your complete satisfaction with every purchase. We understand that circumstances may arise where you must return a product or request a refund. If for any reason you are not satisfied, you may return the item(s) according to the terms outlined below. View More

This Payment Policy outlines the terms and conditions governing all payments made for products purchased through our website. By making a purchase, you agree to be bound by this Payment Policy. View More

Installation Steps

Step1: Turn off gas and electrical power to the oven before starting installation.

Step2: Remove old igniter/pilot assembly and disconnect wiring carefully from terminals.

Step3: Mount new assembly in same bracket position securely.

Step4: Reconnect wires securely and ensure proper alignment of sensor tip.

Step5: Restore power and gas supply, then test ignition cycle safely.

Step6: Check for gas leaks using soapy water solution; never use flame.