
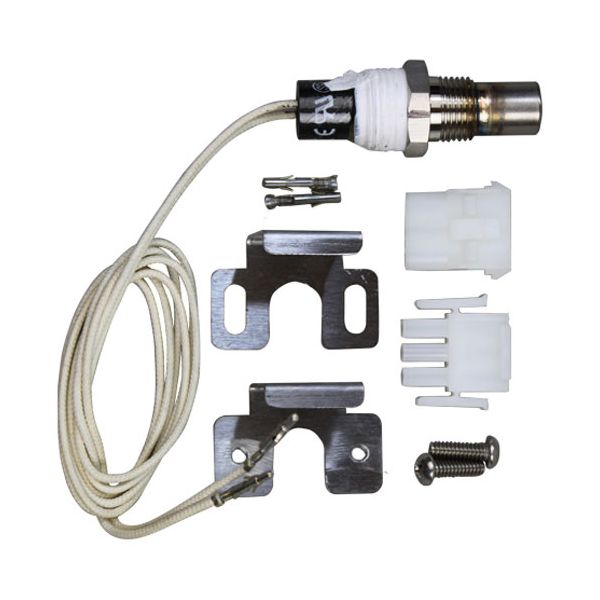
Pitco B6756601 Fryer Hi-Limit Service Kit

Special Price $228.45 Regular Price $440.00
In stock
SKU
B6756601
Manufacturer:

The Pitco B6756601 Fryer Hi-Limit Service Kit is a safety part used on MEII and SEH50 models. This kit monitors high temperatures, which may endanger and turns it off when the temperature reaches the danger level. It comprises connectors, brackets, screws as well as terminals that make the installation process easier and offer contract capable performance. The advantages of using this kit include safety, reduced chances of equipment breakdown and longer fryer durability hence making it a worthy for any kitchen that wants to achieve safe and efficient frying.

Dimensions

  • Length: 4 In
  • Width: 4 In
  • Height: 0.5 In
  • Weight: 0.25 lbs
https://partsfe.com/media/catalog/product/p/i/pitco-b6756601-fryer-hi-limit-service-kit-32558-2.jpg

Product Notes

  • Hi-Limit Service Kit
  • Kit Includes Connectors, Brackets, Screws And Terminals
  • Pitco Fryer Me2, Meii, Se14, Se147, Se148X, Se14R, Se14T,
  • Se14Tr, Se14Tx, Se14X, Se18, Se18R, Se18S, Se714, Sebnb14,
  • Sebnb18, Seh50, Sfse14, Sfse14R, Sfse14T, Sfse14Tr,
  • Sfse14Tx, Sfse14X, Sfse18, Sfse18R, Sgh50
Write Your Own Review
You're reviewing:Pitco B6756601 Fryer Hi-Limit Service Kit
Your Rating
Customer Questions
What maintenance is required for the Pitco B6756601 Service Kit?

Inspect and test the fryer hi-limit switch regularly for correct temperature cutoff and secure wiring. Replace worn components during appliance servicing to maintain accurate operation. Better maintenance prevents overheating and improves kitchen safety.

What are common issues with the Pitco B6756601 Service Kit?

  • Fryer's Hi-limit switch fails, causing the fryer to shut down or not heat properly.
  • Nuisance tripping at normal operating temperatures.
  • Overheating cutoff does not connect consistently.
  • Intermittent reset or restart issues.
  • Corroded or loose wiring connections are causing signal loss.

We strive to provide our customers with a hassle-free and efficient shopping experience. Our shipping policy ensures the timely delivery of your orders and complete customer satisfaction. View More

We are committed to ensuring your complete satisfaction with every purchase. We understand that circumstances may arise where you must return a product or request a refund. If for any reason you are not satisfied, you may return the item(s) according to the terms outlined below. View More

This Payment Policy outlines the terms and conditions governing all payments made for products purchased through our website. By making a purchase, you agree to be bound by this Payment Policy. View More

Installation Steps

Step1: Disconnect power and gas supply, and allow fryer to cool completely to avoid burns or electric shock.

Step2: Open control panel and locate the thermostat assembly inside the fryer.

Step3: Carefully remove the faulty sensor and disconnect wiring connections.

Step4: Install new kit sensor, secure probe in correct position.

Step5: Reconnect wiring securely and ensure insulation is properly seated.

Step6: Restore power and gas, then test fryer cut-off temperature for safety operation.