Imperial 1127 Fan Switch SPDT 7/8"X 1-1/2"

Special Price $42.21 Regular Price $101.19
In stock
SKU
1127
Oven Parts,
Manufacturer:
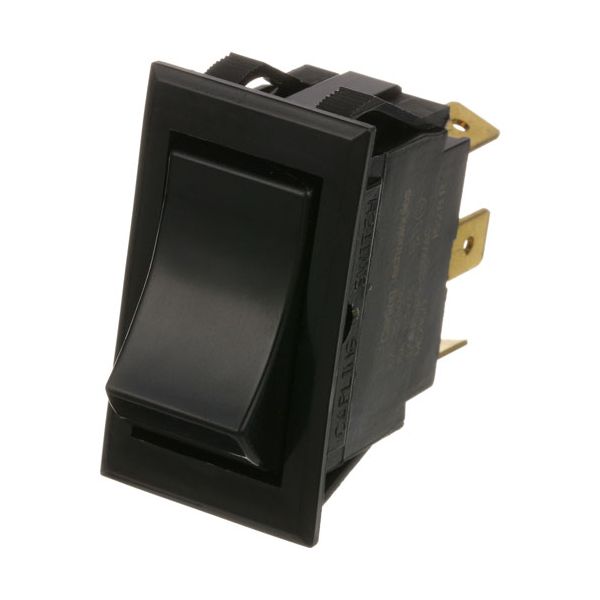
The Imperial 1127 Fan Switch is an Single Pole Double Throw rocker switch for the Cleveland Steamers and different models ovens. This switch is available in a small size of 7/8” x 1-1/2” and has a 10A-250V or 15A-125V rating to guarantee reliability. The switch has a black rocker and three 1/4” tabs for ON-ON operation to regulate the fan with ease. It is a part of Cleveland Steamers and Southbend series of ovens that enhances their performance, safety, and utility for chefs and cooks.

Dimensions

  • Length: 1.875 In
  • Width: 1.75 In
  • Height: 1 In
  • Weight: 0.1 lbs
https://partsfe.com/media/catalog/product/i/m/imperial-1127-fan-switch-spdt-7-8-x-1-1-2-99898-2.jpg

Product Notes

  • Rocker Switch, Spdt (On-On), 3 Tabs 1/4", Black,
  • 10A-250V, 15A-125V Rocker, 7/8" X 1-1/2",
  • Cleveland Steamer Convection Steamer: 21-Cet-8, 21-Cet-16.
  • Imperial Oven Series: Icv, Icvd.
  • Dcs Oven Fsco.
  • Southbend Oven Eb/Eh, Sleb/Eh
DYNAMIC COOKING SYSTEMS:
16087-3, DCS16087-3
IMPERIAL:
ROYAL RANGE:
SOUTHBEND:
Write Your Own Review
You're reviewing:Imperial 1127 Fan Switch SPDT 7/8"X 1-1/2"
Your Rating
Customer Questions
What maintenance is required for the Imperial 1127 Fan Switch?

Operate the fan switch periodically to confirm smooth connection. Keep the surface free from grease buildup. Check wire connections behind the panel. Clean contacts support the switch respond without delay.

What are common issues with the Imperial 1127 Fan Switch?

  • Fan not responding when switched on.
  • Delayed activation of fan system.
  • Contacts failing to connect properly.
  • Switch becoming stuck in position.

We strive to provide our customers with a hassle-free and efficient shopping experience. Our shipping policy ensures the timely delivery of your orders and complete customer satisfaction. View More

We are committed to ensuring your complete satisfaction with every purchase. We understand that circumstances may arise where you must return a product or request a refund. If for any reason you are not satisfied, you may return the item(s) according to the terms outlined below. View More

This Payment Policy outlines the terms and conditions governing all payments made for products purchased through our website. By making a purchase, you agree to be bound by this Payment Policy. View More

Installation Steps

Step1: Turn off power at the breaker to prevent electrical shock.

Step2: Remove the control panel or cover to access the existing switch.

Step3: Label and disconnect wires from the old switch.

Step4: Remove the faulty switch and mount the new one securely.

Step5: Reconnect wires to the correct terminals.

Step6: Restore power and test switch functionality.

Step7: Ensure all connections are tight and safe.