Garland GLG01137 Roller Lever Microswitch W/1" MT Centers 20 AMP 125/250/480V

Special Price $30.69 Regular Price $52.10
In stock
SKU
GLG01137
Manufacturer:
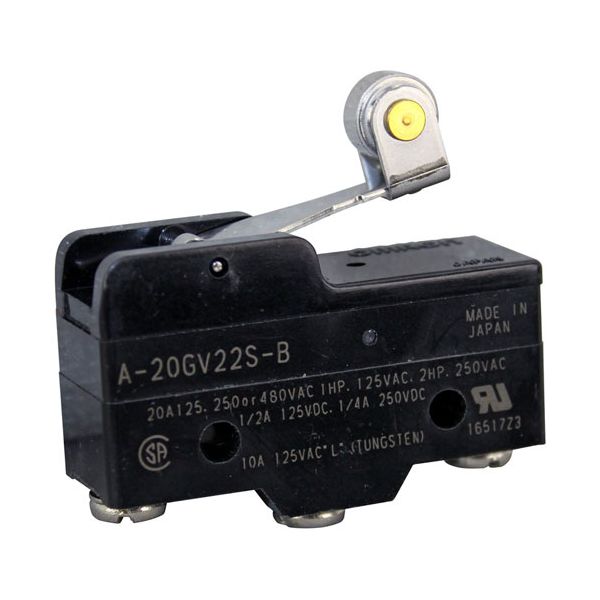
The Garland GLG01137 Roller Lever Microswitch is intended to be used in commercial kitchen equipment where position or motion sensing is needed. This switch is mounted with 1-inch mounting centers and has a roller lever actuator to react to mechanical contact. It has a 20 amp rating on 125, 250 and 480 volts and can be used in various fryer and cooking appliance setups. The microswitch is a component of the electrical control circuit of the equipment and serves to indicate certain operating conditions, which facilitate coordinated work of the system.

Dimensions

  • Length: 2 In
  • Width: 0.6 In
  • Height: 1.6 In
  • Weight: 0.1 lbs
https://partsfe.com/media/catalog/product/g/a/garland-glg01137-roller-lever-microswitch-w-1-mt-centers-20-amp-125-250-480v-23214-2.jpg

Product Notes

  • Roller Lever Microswitch
  • 20 Amp, 125/250/480V, 1" Mt Ctrs
  • Cleveland Steam Pro
  • Franklin Chef Oven Series: Ghch, Ghcv, Ghsv, Gsch.
  • Frymaster Fryer All Units W/Auto Basket Lift
  • Including Spaghetti Magic.
  • Garland Oven Series: S/N 39369 & Before: Te, Tg, Tte, Ttg.
  • Fryer E18F
  • Pitco Fryer Where Applicable, All W/Basket Lifts.
More Information
Disable SaleableNo
CHAMPION:
DUKE:
148077, DUK148077
MAGIKITCH'N:
STAR MFG:
Write Your Own Review
You're reviewing:Garland GLG01137 Roller Lever Microswitch W/1" MT Centers 20 AMP 125/250/480V
Your Rating
Customer Questions
What maintenance is required for the Garland GLG01137 Roller Lever Microswitch?

Keep the switch clean and free from debris that may affect movement. Inspect for wear and ensure proper alignment. Routine checks support accurate switching action and secure electrical operation.

What are common issues with the Garland GLG01137 Roller Lever Microswitch?

  • Switch not activating consistently.
  • Mechanical wear affecting lever movement.
  • Electrical contact failure disrupting signals.
  • Misalignment preventing proper connection.
  • Delayed response during operation.

We strive to provide our customers with a hassle-free and efficient shopping experience. Our shipping policy ensures the timely delivery of your orders and complete customer satisfaction. View More

We are committed to ensuring your complete satisfaction with every purchase. We understand that circumstances may arise where you must return a product or request a refund. If for any reason you are not satisfied, you may return the item(s) according to the terms outlined below. View More

This Payment Policy outlines the terms and conditions governing all payments made for products purchased through our website. By making a purchase, you agree to be bound by this Payment Policy. View More

Installation Steps

Step1: Disconnect power before installation.

Step2: Remove the old microswitch by detaching the screws and wires.

Step3: Mount the new microswitch in the same position.

Step4: Reconnect all wires securely.

Step5: Restore power and test switch operation.