Garland G01137 Fryer Roller Lever Microswitch W/1" MT Centers 20 AMP 125/250/480V

Special Price $30.69 Regular Price $52.10
In stock
SKU
G01137
Manufacturer:
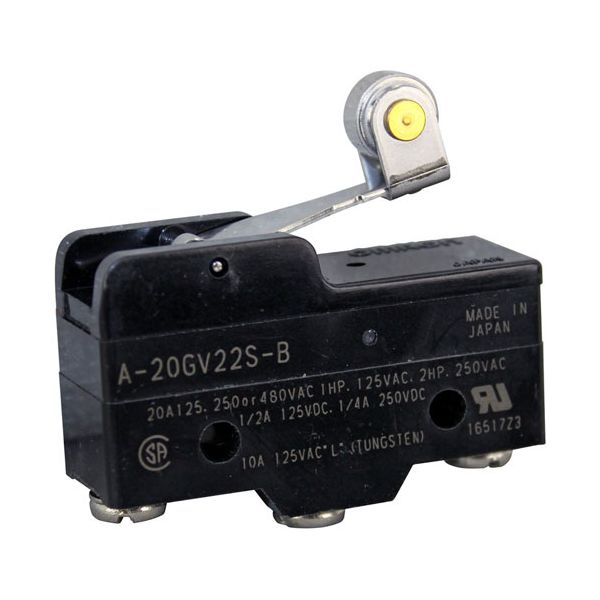
The Garland G01137 Roller Lever Microswitch is a control component that is installed in compatible Garland commercial fryers to sense mechanical motion or change of position. It is mounted with 1" centers and has a roller lever, which is connected when it is touched by moving components of the fryer assembly. It is rated at 20 amps at 125 to 480 volts and can be used in a variety of electrical configurations used in food service equipment. This is part of the control system, and it feeds input signals that aid in the control of the operational states.

Dimensions

  • Length: 2 In
  • Width: 0.6 In
  • Height: 1.6 In
  • Weight: 0.1 lbs
https://partsfe.com/media/catalog/product/g/a/garland-g01137-roller-lever-microswitch-w-1-mt-centers-20-amp-125-250-480v-62533-2.jpg

Product Notes

  • Roller Lever Microswitch
  • 20 Amp, 125/250/480V, 1" Mt Ctrs
  • Cleveland Steam Pro
  • Franklin Chef Oven Series: Ghch, Ghcv, Ghsv, Gsch.
  • Frymaster Fryer All Units W/Auto Basket Lift
  • Including Spaghetti Magic.
  • Garland Oven Series: S/N 39369 & Before: Te, Tg, Tte, Ttg.
  • Fryer E18F
  • Pitco Fryer Where Applicable, All W/Basket Lifts.
More Information
Disable SaleableNo
CHAMPION:
DUKE:
148077, DUK148077
MAGIKITCH'N:
STAR MFG:
Write Your Own Review
You're reviewing:Garland G01137 Fryer Roller Lever Microswitch W/1" MT Centers 20 AMP 125/250/480V
Your Rating
Customer Questions
What maintenance is required for the Garland G01137 Roller Lever Microswitch?

Check the microswitch for smooth lever movement and consistent activation. Clean around the lever to remove debris or grease. Inspect terminals for secure connections. Proper maintenance ensures accurate signal switching and prevents intermittent faults.

What are common issues with the Garland G01137 Roller Lever Microswitch?

  • Lever sticking due to debris.
  • Intermittent contact from loose wiring.
  • Microswitch failing to activate.
  • Electrical arcing under load.

We strive to provide our customers with a hassle-free and efficient shopping experience. Our shipping policy ensures the timely delivery of your orders and complete customer satisfaction. View More

We are committed to ensuring your complete satisfaction with every purchase. We understand that circumstances may arise where you must return a product or request a refund. If for any reason you are not satisfied, you may return the item(s) according to the terms outlined below. View More

This Payment Policy outlines the terms and conditions governing all payments made for products purchased through our website. By making a purchase, you agree to be bound by this Payment Policy. View More

Installation Steps

Step1: Shut off power to the appliance.

Step2: Access the switch mounting area near moving components.

Step3: Unscrew the microswitch and disconnect wiring.

Step4: Mount the new switch in the same position.

Step5: Adjust the roller lever to align with the actuator.

Step6: Reconnect wiring and test for proper triggering.