
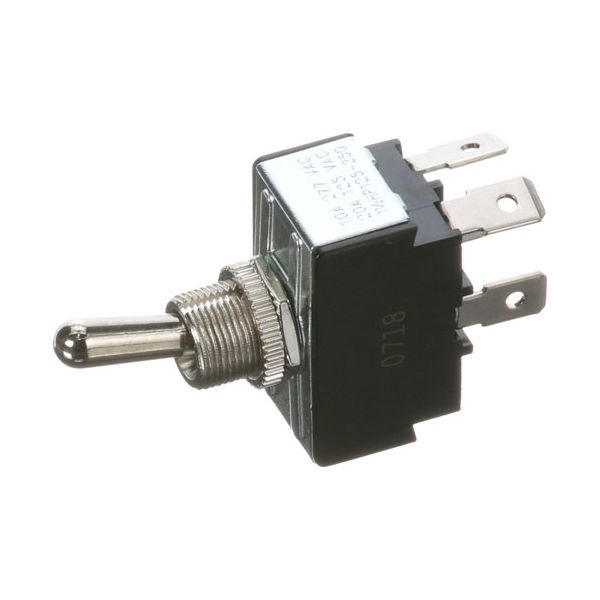
Vulcan Hart 00-340324-00006 Oven Toggle Switch DPST 1/2"

Special Price $14.54 Regular Price $17.00
In stock
SKU
00-340324-00006
The Vulcan Hart 00-340324-00006 Oven Toggle Switch is a DPST switch that is used to operate electrical circuits in commercial ovens. It works by connecting or disconnecting two independent connections at the same time as the toggle is switched, cutting the supply of electricity to the heating elements. This is a common switch on the front control panel of the oven, which the user can use to switch the appliance on or off. The switch is 1/2-inch mounted with a secure fit.

Dimensions

  • Length: 1.2 In
  • Width: 0.7 In
  • Height: 2.3 In
  • Weight: 0.1 lbs
https://partsfe.com/media/catalog/product/v/u/vulcan-hart-00-340324-00006-toggle-switch-1-2-dpst-68178-2.jpg

Product Notes

  • [ Toggle Switch] [ Fits Hole 1/2" ] [ On/Off ] [ Dpst ]
  • [ Terminals 4 (1/4" Tabs) ] [ Volt/Amp 20A/125-10A/277V ]
  • Alto-Shaam Oven Models Made In 1985 & After: 767-Sk,
  • Ch-50-1,Ch-75-1,Chs-76. Series (Made In 1985 & After):
  • 100-Th-I, 100-Th-Ii, 500-Th-Ii, 750-B, 750-Th-Ii,
  • 1000-Th-I,1000-Th-Ii, Ch-100.
  • Warmer Models Made In 1985 & After: 750-B, 750-Gdu,
  • 750-Gdu/Pt, Gd-80, Gd-80P.
  • Cecilware Warmer Ffw, Fw, Fwl.
  • Cleveland Braising Pan Set-10, Set-15, Series: Sem, Sel
  • Cres-Cor Warmer 747-(29,30,32,33), Hj, Hjr.
  • Henny Penny Fryer 680
  • Warmer Bw-4,6,8, Hc-900,902,903,906,908,942,943,944, Hcw
Write Your Own Review
You're reviewing:Vulcan Hart 00-340324-00006 Oven Toggle Switch DPST 1/2"
Your Rating
Customer Questions
What maintenance is required for the Vulcan Hart 00-340324-00006 Toggle Switch?

Inspect the toggle switch regularly for looseness, corrosion, or arcing. Clean external terminals carefully to ensure solid electrical contact. Tighten connections during routine service. Proper maintenance ensures accurate oven operation and reduces risk of electrical failure or intermittent heating issues.

What are common issues with the Vulcan Hart 00-340324-00006 Toggle Switch?

  • Loose connections causing intermittent power.
  • Contact wear leading to failure to switch modes.
  • Arcing or burnt contacts.
  • Oven switch not connecting or sticking.
  • Thermal degradation of internal components.
  • Inconsistent electrical continuity under load.

We strive to provide our customers with a hassle-free and efficient shopping experience. Our shipping policy ensures the timely delivery of your orders and complete customer satisfaction. View More

We are committed to ensuring your complete satisfaction with every purchase. We understand that circumstances may arise where you must return a product or request a refund. If for any reason you are not satisfied, you may return the item(s) according to the terms outlined below. View More

This Payment Policy outlines the terms and conditions governing all payments made for products purchased through our website. By making a purchase, you agree to be bound by this Payment Policy. View More

Installation Steps

Step1: Disconnect oven power at breaker and check no voltage.

Step2: Remove control panel screws and access existing switch wiring layout.

Step3: Safely disconnect old switch terminals and label wires.

Step4: Install new switch, matching terminals exactly and tightening connections securely.

Step5: Reassemble panel, restore power, and test operation for proper switching.
