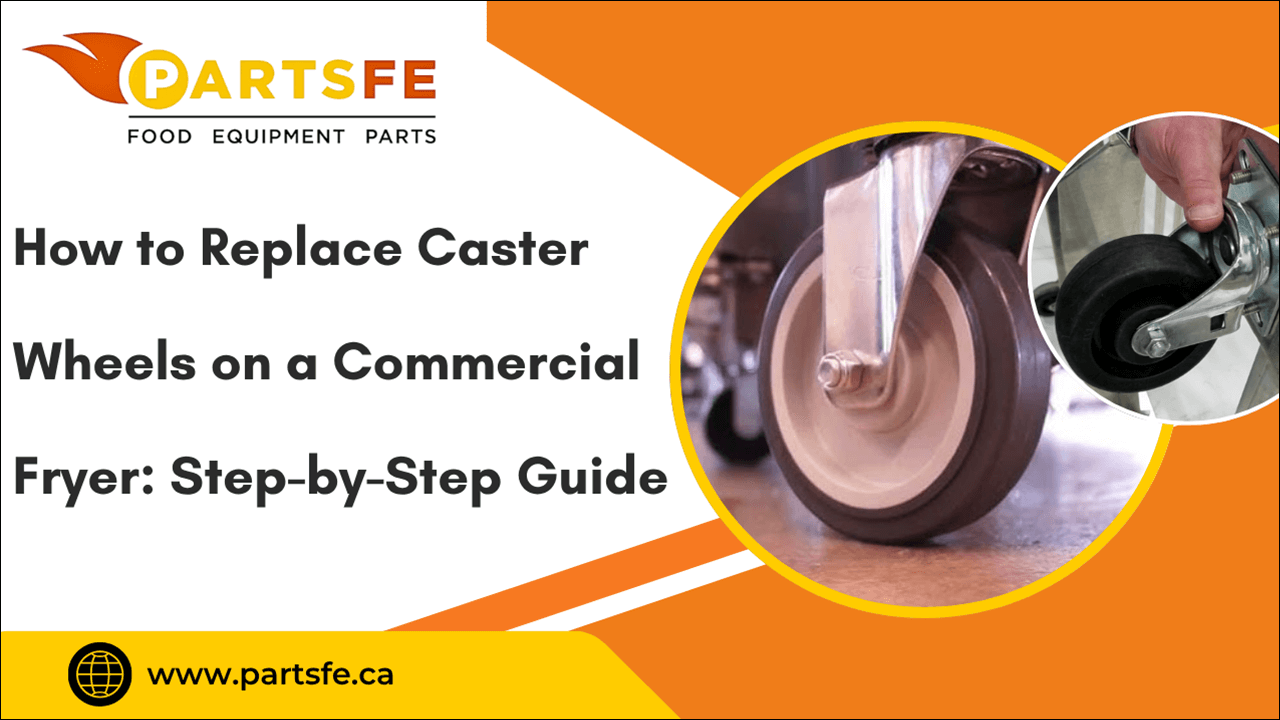
How to Replace Caster Wheels on a Commercial Fryer: Step-by-Step Guide
Replacing caster wheels on a commercial fryer is a crucial task to maintain the safety, mobility, and overall functionality of your kitchen equipment. Over time, caster wheels may wear out, become damaged, or seize up, which can make moving the fryer difficult and increase the risk of accidents or damage to your kitchen floor. Timely replacement of these wheels not only ensures smooth and safe operation but also prolongs the life of your fryer. This detailed step-by-step guide will take you through the entire process of removing old caster wheels and installing new ones properly. Whether you’re a first-timer or an experienced technician, these clear instructions and helpful tips will enable you to complete the replacement quickly and safely, keeping your fryer stable and easy to maneuver.
Understanding the Importance of Replacing Caster Wheels on a Commercial Fryer in Busy Kitchens
In busy kitchens, commercial fryer caster wheels experience heavy use and can wear out quickly. Damaged or dirty wheels reduce mobility and stability, affecting safety and efficiency. Replacing them promptly ensures smooth operation and helps prevent accidents or equipment damage.
Replacing caster wheels regularly is important for several key reasons:
-
Ensure Smooth Mobility: Worn or broken casters make it difficult to move the fryer, slowing down kitchen operations and increasing labor effort.
-
Maintain Safety: Damaged wheels can cause the fryer to become unstable or tip, posing serious safety risks to kitchen staff.
-
Prevent Floor Damage: Faulty casters can scratch or dent kitchen floors, leading to costly repairs and uneven surfaces that affect other equipment.
-
Extend Equipment Life: Replacing casters helps reduce strain on the fryer’s frame and components, prolonging its lifespan.
-
Maintain Kitchen Efficiency: Properly functioning caster wheels allow easy cleaning and repositioning, keeping your kitchen hygienic and running smoothly.
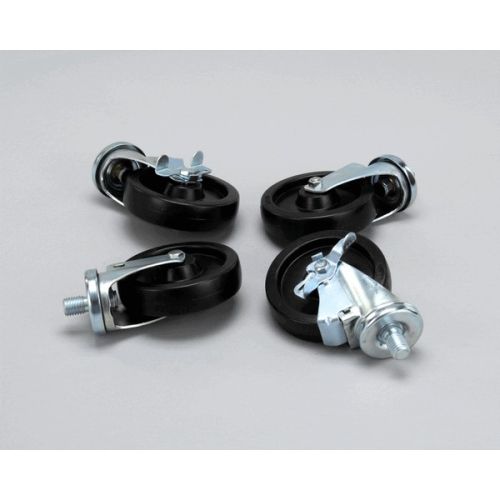
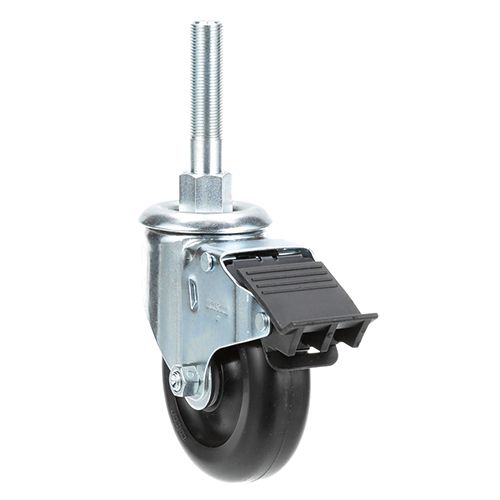
Looking to replace caster wheels on your commercial fryer? PartsFe offers high-quality parts like stem caster wheels, swivel casters, and locking casters from leading brands like Allpoints, Rubbermaid, Component Hardware, and Winston. Find the perfect fit for your fryer and keep your kitchen equipment moving smoothly.
Essential Tools for Replacing Commercial Fryer Caster Wheels
To ensure a safe and efficient replacement of caster wheels on your commercial fryer, gather the following proper tools before you start:
-
Adjustable Wrench or Socket Wrench Set: For loosening and tightening nuts and bolts securing the caster wheels.
-
Screwdrivers(Phillips and Flathead): To remove any screws or fasteners holding brackets or wheel assemblies.
-
Pliers: Helpful for gripping and holding parts or pulling out pins.
-
Lubricant Spray (WD-40): To make removing rusty or jammed bolts easier.
-
Replacement Caster Wheels: Match the size, load capacity, and type recommended for your fryer model.
-
Cleaning Cloths and Degreaser: To clean mounting surfaces and remove debris or grease before installing new wheels.
-
Safety Gloves: To shield your hands from hot surfaces, filth, and sharp edges while working.
-
Rubber Mallet (optional): To carefully tap parts or wheels into position without causing any harm.
Having these proper tools on hand will make the caster wheel replacement straightforward and help maintain your fryer’s mobility and stability.
How to Replace Caster Wheels on a Commercial Fryer
Replacing the caster wheels for a commercial fryer is a straightforward process, but it must be done carefully to ensure safety and proper function. To do the task quickly, follow these steps:
-
Turn Off and Cool the Fryer: Before beginning, make sure the fryer is totally cooled, unplugged, and switched off.
-
Empty and Clean the Fryer: Drain any oil and clean the fryer to prevent slipping or accidents during the replacement.
-
Tilt or Lift the Fryer Safely: Use a heavy-duty jack or get assistance to carefully lift one side of the fryer, exposing the caster wheels. Always make sure it's securely fastened to avoid tipping.
-
Remove the Old Casters: To remove the old casters, unscrew the bolts or other fasteners that are holding them in place using a wrench or socket set.
-
Clean the Mounting Area: Remove grease, dirt, or debris from the mounting area using a degreaser and a clean cloth.
-
Install New Casters: Align the new caster wheels properly and secure them tightly using the appropriate fasteners.
-
Lower the Fryer and Test Movement: Once all casters are replaced, lower the fryer and gently test the wheels for stability and smooth movement.
Check out this guide on how to replace your deep fryer filter to ensure your fryer runs efficiently alongside caster wheel maintenance.
Troubleshooting Common Commercial Fryer Caster Wheel Replacement Issues
Commercial fryer caster wheel replacement can sometimes uncover unexpected problems, from misaligned parts to mobility issues after installation. Early identification of these issues helps ensure a safe working environment and prevents equipment damage. Use the guide below to troubleshoot effectively.
Bolts Won’t Loosen
Fasteners on commercial fryer casters are often rusted, corroded, or over-tightened.
Signs:
-
Bolts won’t turn or move with normal effort
-
Wrench slips or strips the bolt
-
Visible rust or buildup around bolt heads
Fix: Apply a penetrating lubricant like WD-40 and allow it to soak for 10–15 minutes. If more torque is required, use an impact wrench or a breaker bar.
New Casters Don’t Fit Properly
This usually happens due to incorrect caster size, mounting plate, or stem type for your commercial fryer.
Signs:
-
Holes don’t align with the fryer’s mounting pattern
-
Casters feel too tight or too loose
-
Wheels don’t sit flush against the fryer base
Fix: Check the fryer manual or existing caster specs before ordering replacements. Only install casters that match the exact size, stem, and plate requirements for your commercial fryer.
Fryer Wobbles After Installation
Uneven caster height or loose bolts on the commercial fryer can cause instability.
Signs:
-
Fryer rocks or tilts when pushed
-
Uneven gap between the fryer and the floor
-
Rattling noise when the fryer is moved
Fix: Verify all casters are the same height and securely fastened. Use a level to check fryer balance and tighten any loose bolts.
Fryer Doesn’t Roll Smoothly
Debris in swivel joints or over-tightened caster hardware can restrict movement on your commercial fryer.
Signs:
-
Wheels drag or get stuck
-
Fryer is difficult to move
-
Swivel action is stiff or jerky
Fix: Clean caster wheels and swivels thoroughly to remove grease or debris. Slightly loosen hardware if the wheels were over-tightened during installation.
Caster Screws Keep Loosening
Vibration from commercial fryer operation or lack of thread-locking compound may cause this.
Signs:
-
Wheels become wobbly over time
-
Screws visibly backing out
-
Fryer feels unstable after a few uses
Fix: Apply a medium-strength thread-locking adhesive to bolts and nuts before reinstalling. This prevents loosening from vibration and heat during operation.
Best Practices to Follow After Replacing Fryer Caster Wheels
After successfully replacing the caster wheels on your commercial fryer, following some best practices will help maintain safety, prolong the life of the wheels, and ensure smooth mobility. The following are crucial steps to remember:
-
Test the Fryer’s Mobility: Before putting the fryer back into full operation, gently move it around to confirm that all caster wheels roll and swivel smoothly without any unusual resistance or noise.
-
Check for Stability: Ensure that the fryer sits level on the floor and does not wobble. Uneven casters or improper tightening can affect stability, so double-check all fasteners.
-
Regularly Inspect Wheels: Make it a routine to inspect caster wheels for wear, damage, or looseness. Early detection can prevent unexpected failures or accidents.
-
Keep Wheels Clean: Remove grease, dirt, and debris from the caster wheels frequently to prevent buildup that can hinder smooth movement.
-
Avoid Overloading: Ensure the fryer does not exceed the weight capacity of the new caster wheels to avoid premature damage or unsafe conditions.
-
Lubricate Moving Parts: Periodically apply lubricant to wheel bearings and swivel joints to maintain optimal functionality.
-
Secure Fasteners: After initial use, recheck and tighten bolts or nuts if needed, as vibrations may loosen them over time.
Following these best practices will help you maximize the lifespan of your caster wheels and maintain a safe kitchen environment.
Check out this guide on choosing the right caster wheel for commercial fryers to ensure you select the safest and most durable option for your equipment.
Common Mistakes to Avoid When Replacing Fryer Casters
A commercial fryer's caster wheels need to be replaced carefully to prevent expensive mistakes. Here are some actual, typical errors to be aware of:
-
Buying Incompatible Casters: Using wheels that don’t support the fryer’s weight or don’t match the mounting style leads to poor stability and potential damage.
-
Ignoring the Fryer’s Weight Capacity: Installing casters with a lower load rating than the fryer can cause wheels to fail quickly or break during movement.
-
Improper Fryer Stabilization: Improper fryer stabilization during caster wheel replacement can lead the fryer to tip or shift, leading to potential injury or damage.
-
Using Incorrect Tools: Using the wrong-sized wrenches or screwdrivers can strip bolts or damage mounting hardware, making removal and installation difficult.
-
Skipping Surface Preparation: Not cleaning the caster mounting surfaces can cause improper fitting and lead to loose casters or wobbling.
-
Not Checking Wheel Alignment: Installing casters unevenly or mixing different wheel types can cause the fryer to tilt or roll unevenly.
-
Overtightening: Applying too much force when tightening bolts can strip threads or crack mounting plates, compromising safety.
-
Neglecting Post-Installation Testing: Failing to test caster movement and stability after replacement can leave unnoticed problems that affect fryer mobility and safety.
By avoiding these errors, you’ll ensure your fryer’s casters remain dependable and safe over time.
Conclusion
Replacing the commercial fryer caster wheels doesn’t have to be complicated when you follow the right process and use the proper tools. By taking the time to troubleshoot issues, avoid common mistakes, and adhere to best practices after installation, you’ll ensure your fryer remains safe, stable, and easy to maneuver. Timely replacement helps prevent downtime and costly repairs, keeping your kitchen running smoothly for years to come. Investing effort into proper replacement now saves you from bigger problems later. With the right approach, your commercial fryer will continue to perform reliably in even the busiest kitchen environments.
FAQS
What is the average fryer caster wheel replacement cost?
The average fryer caster wheel replacement cost ranges from $20 to $100 per wheel, depending on size and features. Additional labor costs may apply if installed professionally.
How do you remove caster wheels?
To remove caster wheels, first, ensure the equipment is stable and lifted if needed. Then, use the appropriate tools (like a wrench or screwdriver) to loosen and remove the mounting bolts or screws.
How do I know my caster wheel size?
Measure the diameter of the wheel from edge to edge and check the mounting plate or stem size to ensure compatibility with your equipment. Refer to the manufacturer’s specifications for exact sizing.
Can I install heavy-duty fryer casters myself?
Yes, if the correct size and type are used, heavy-duty fryer casters can be installed with basic tools. However, professional installation ensures safety and proper alignment.