How to Troubleshoot an American Range Fryer: Step-by-Step Repair Guide
When your American Range fryer suddenly stops working in the middle of service, it’s more than an inconvenience; it's lost time, lost revenue, and frustrated customers. A fryer that won’t heat, maintain temperature, or power on can disrupt your entire kitchen flow within minutes. In high-demand environments, every second counts, and equipment failure simply isn’t an option.
The good news? Many common fryer problems can be diagnosed and resolved without immediately calling for professional repair. With the right troubleshooting steps and a clear understanding of potential causes, you can quickly identify the issue, minimize downtime, and get your fryer back to delivering consistent, high-quality results.
Understanding How an American Range Fryer Works
Before attempting any repairs, it’s essential to have a clear understanding of how an American Range fryer functions. Familiarity with its main parts and their roles makes it easier to pinpoint issues and troubleshoot them efficiently without guesswork. Here is the breakdown of the primary components:
-
Gas Energy Source: The fryer operates on natural gas or propane, which fuels the burners to heat the oil inside the fry pot.
-
Thermostat System: The thermostat monitors the oil temperature continuously. It activates the heating system whenever the temperature falls below the set level.
-
High-Limit Safety Switch: This safety control prevents the fryer from overheating. It automatically shuts off power or gas if the oil exceeds safe temperature limits.
-
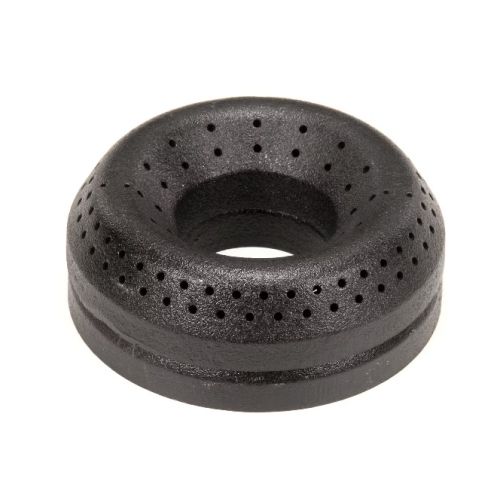
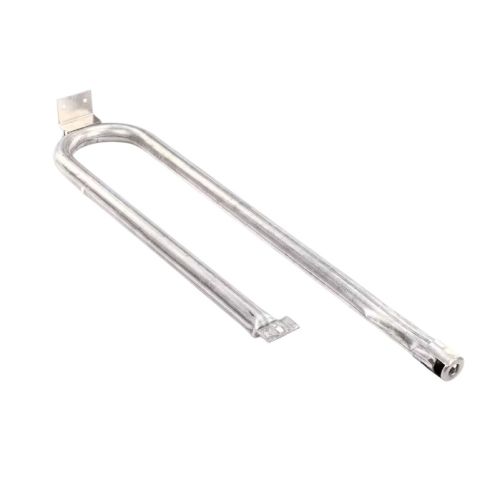
Burners: Burners generate a controlled flame that heats the fry pot evenly and ensures consistent cooking performance.
-
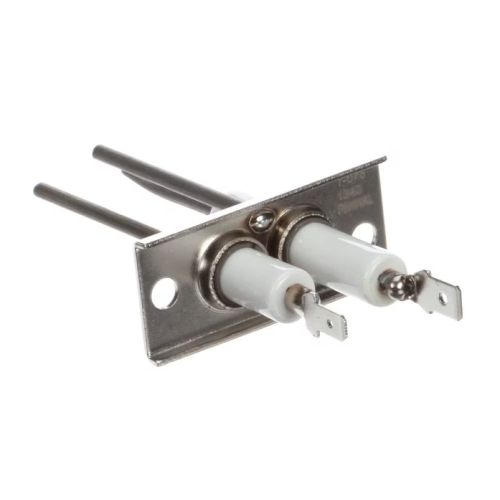
Thermopile or Ignition System: In gas models, this component keeps the gas valve open after ignition. If faulty, the pilot light may not stay lit.
-
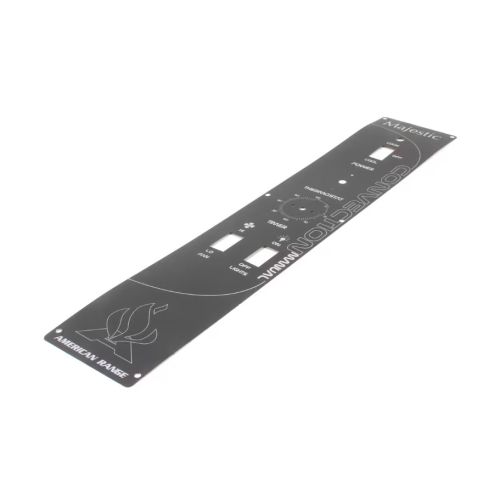
Control and Gas Valves: These regulate the flow of gas and manage heat output. They ensure stable and consistent temperature control during operation.
Discover the essential Imperial commercial deep fryer parts in this video to maintain peak performance in your kitchen and learn how to identify, troubleshoot, and replace them like a pro.
Common American Range Fryer Problems and Their Causes
Even the most reliable American Range fryers can experience performance issues over time. Understanding these common problems and their causes can help you troubleshoot quickly and safely.
Fryer Not Heating
Possible Causes: Faulty thermostat. Tripped high-limit switch. Clogged or dirty burners (gas)
Fixes: Check the thermostat and replace it if it is not functioning properly. Reset the high-limit switch and clean or replace any damaged heating elements or burners to restore normal heating.
Pilot Light Won’t Stay Lit (Gas Models)
Possible Causes: Weak or defective thermopile. Dirty pilot assembly. Faulty gas valve. Insufficient gas pressure
Fixes: Clean the pilot assembly thoroughly to remove any dirt or debris that could affect ignition. Ensure the gas valve operates correctly and that gas pressure is sufficient to maintain a steady pilot flame.
Oil Not Reaching Desired Temperature
Possible Causes: Malfunctioning thermostat. Restricted gas flow. Partially damaged heating element. Carbon buildup on burners
Fixes: Test the thermostat to ensure it maintains the correct temperature. Clear any restrictions in the gas flow and clean the burners to remove carbon buildup. Check the heating element for damage and ensure it heats efficiently.
Fryer Not Powering On
Possible Causes: Blown fuse. Tripped circuit breaker. Loose wiring. Power supply interruption
Fixes: Check for blown fuses and reset tripped circuit breakers, secure all loose wiring connections, and ensure the power supply is stable. Verify the fryer’s power switch and internal components function properly to allow it to turn on reliably.
Oil Foaming or Smoking Excessively
Possible Causes: Overheated oil. Contaminated or old oil. Dirty fry pot or heating elements. Fryer overfilled with food
Fixes: Replace old or contaminated oil and monitor cooking temperature. Clean the fry pot and heating elements, and avoid overfilling baskets to prevent excessive foaming or smoking.
Tired of replacing fryer components that don’t last? Explore PartsFe, your trusted supplier of high-quality kitchen equipment spare parts for commercial restaurants at unbeatable prices. We stock heating elements, thermostats, thermocouples, baskets, oil tanks, filtration systems, and more from top brands like American Range, Vulcan, Southbend, and Garland with fast shipping straight to your kitchen.
Step-by-Step Troubleshooting and Repair Process
Before you begin, always shut off the gas supply. This structured approach focuses on diagnostic confirmation and targeted fixes, not just basic checks.
Here are the following steps to systematically troubleshoot and repair your American Range fryer:
Step 1: Check Sensor Accuracy
Use a calibrated temperature probe to compare the fryer’s thermostat readings with actual oil temperature. Recalibrate or replace the sensor if the deviation is consistently more than the fryer’s tolerance threshold.
Step 2: Test Gas System Performance
Check gas flow under operating conditions and observe burner response. Monitor flame stability and consistency to detect intermittent faults or early-stage performance issues.
Step 3: Inspect Burner Flame
Examine the burner jet pattern and flame shape. Uneven flame or incomplete combustion often signals improper gas pressure, jet obstruction, or air-to-fuel imbalance.
Step 4: Measure Ignition Timing
Use a stopwatch and multimeter to measure thermopile and valve response times. Slow ignition or delayed valve actuation can mimic other failures.
Step 5: Evaluate Oil Heat Transfer
Check the temperature difference between the heating source and the bulk oil. A low temperature difference may indicate carbon buildup, glycerin slicks, or air pockets around the burners.
Step 6: Run Cycle Test
Operate the fryer through multiple heat–cool cycles while logging temperature and control responses. This reveals control loop instability, thermostat hysteresis, or latent relay failures.
Safety Note: Never skip safety interlocks or work with missing panels—your protection comes first. Keep all flammable materials clear and have a grease-fire extinguisher within reach. Double-check every connection before powering up to avoid sparks, leaks, or unexpected fires.
Find out how to troubleshoot and replace commercial fryer thermocouples like a pro for safe, precise, and efficient fryer operation.
When to Replace Vs Repair American Range Fryers
American Range fryer parts help maintain consistent frying and precise temperature control, making it simpler to determine whether a repair or replacement is necessary. By recognizing the issues early, you can keep your commercial kitchen operating efficiently.
Repair vs Replacement Solutions:
|
Issue |
When to Repair |
When to Replace |
|
Control Board Glitches or Relay Chatter |
Update firmware (if supported) or replace faulty relays on the control board. |
Replace the entire control board if glitches continue or multiple relays fail simultaneously. |
|
Multiple Thermocouples or Probes Fail |
Replace individual faulty sensors if only one or two fail. |
Replace the entire sensor assembly if several sensors fail, indicating systemic degradation. |
|
Burner Jet Wear (Gas Models) Leading to Lean Combustion |
Clean or adjust burner jets and check gas pressure if wear is minimal. |
Replace the worn burner assembly when erosion affects flame stability and efficiency. |
|
Frame Base Corrosion and Insulation Breakdown |
Treat corrosion locally, reinforce with protective coatings, and replace fasteners. |
Replace the fryer when corrosion compromises structural integrity and internal insulation repeatedly. |
Caution: Ignoring corrosion under panels or around the fryer’s frame, along with drifting sensors or delayed ignition, can cause parts to fail and oil temperatures to become unsafe, creating serious risks of burns, fires, or major fryer damage.
Summary: Maintaining Your American Range Fryer for Long-Term Performance
Consistent long‑term performance of an American Range fryer isn’t just about routine cleaning; it’s about anticipating wear patterns, understanding how usage cycles affect key components, and acting before small problems become costly failures. By paying attention to subtle signs like sensor drift, thermal fatigue, or changing oil heat transfer behavior, you can keep your fryer operating reliably and predictably. A proactive approach, combined with smart repair vs. replace decisions, helps maintain kitchen rhythm, optimize oil life, and preserve food quality.
Key Takeaways
-
Track Thermal Drift Over Time: Logging subtle thermostat deviations helps identify early sensor fatigue before it affects cooking consistency.
-
Monitor Heat Transfer Efficiency: A declining temperature differential between elements and oil can signal hidden buildups or micro‑cracks in heat paths.
-
Use Cycle Performance Trends: Analyzing how the fryer behaves over multiple heat–cool cycles reveals latent control issues not seen in single tests.
-
Assess Component Aging Patterns: Repeated failures in unrelated parts often indicate systemic stress rather than isolated faults.
-
Prioritize Oil Behavior Signals: Changes in foaming, smoke point, or surface sheen often precede mechanical failures and deserve early action.
FAQs
Why is my American Range fryer not turning on?
Check for blown fuses, tripped circuit breakers, or loose wiring connections. Ensure the power supply is stable and the fryer’s power switch is functioning properly.
Why did my American Range fryer suddenly stop working?
Sudden shutdowns are often caused by power interruptions, faulty components, or sensor failures. Inspect fuses, wiring, and heating elements to identify the issue.
How to reset an American Range fryer?
Turn off the fryer and disconnect it from power for a few minutes. Restore power and follow the manufacturer’s reset procedure to clear errors and restart the unit.
|
Disclaimer: The information provided in this guide is for educational and troubleshooting purposes only. Always follow manufacturer instructions and local safety regulations when servicing your American Range fryer. Users are responsible for ensuring safe handling and proper repair procedures. |