
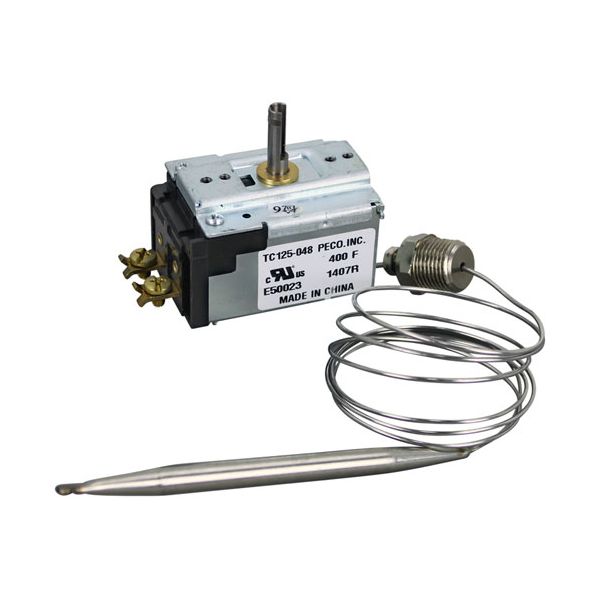
Vulcan Hart 00-419999-00001 Fryer TC Type 125 Thermostat W/ 5/16" X 5" Bulb 3/8" MPT

Special Price $114.93 Regular Price $186.42
In stock
SKU
00-419999-00001
The Vulcan Hart 00-419999-00001 Thermostat 5/16 inch x 5 inch Bulb is an upgrade to control the temperatures of commercial fryers. It controls and checks the temperature of the oil maintaining the balance of cooking and avoiding excessive cooking. The thermostat installed in the control assembly of the fryer is used with the heating elements to ensure safe and efficient operation of the fryer through the appropriate temperature settings. This component is often used in restaurants, cafeterias and other food service settings and is essential to ensure the stable operation of fryers.

Dimensions

  • Length: 6.5 In
  • Width: 2 In
  • Height: 4.5 In
  • Weight: 0.55 lbs
https://partsfe.com/media/catalog/product/v/u/vulcan-hart-00-419999-00001-fryer-tc-type-125-thermostat-w-5-16-x-5-bulb-3-8-mpt-64698-2.jpg

Product Notes

  • [ Thermostat Type- Tc125 ] [ Temp 200-400 ]
  • [ Bulb 5/16" X 5" ] [ Cap 48" ] [ 3/8" Mpt Stuff Box ]
  • [ Dial To Use # 22-1315 Pointer Knob ]
  • Vulcan Fryer 1Gr45M, 1Gr65M, 1Gr85M, Ef3, Ef4, Ef5, Gr35,
  • Gr35F, Gr45, Gr45F, Gr65, Gr65F, Gr85, Gr85F, Grc35F,
  • Grc45F, Grc65F, Grc85F, Grd35F, Grd45F, Grd65F, Grd85F,
  • Grs35F, Grs45F, Grs65F, Grs85F
Write Your Own Review
You're reviewing:Vulcan Hart 00-419999-00001 Fryer TC Type 125 Thermostat W/ 5/16" X 5" Bulb 3/8" MPT
Your Rating
Customer Questions
What maintenance is required for the Vulcan Hart 00-419999-00001 Thermostat?

Inspect the fryer thermostat bulb for grease buildup and clean with a non-abrasive cloth. Check electrical connections and probe alignment to ensure accurate temperature control and safe operation. Periodically calibrate unit and replace worn components for consistent frying performance.

What are common issues with the Vulcan Hart 00-419999-00001 Thermostat?

  • Thermostat calibration drift over time.
  • Probe damage or insulation failure affecting sensing.
  • Intermittent heating cycles and unstable output.
  • Loose electrical connections causing erratic control signals.

We strive to provide our customers with a hassle-free and efficient shopping experience. Our shipping policy ensures the timely delivery of your orders and complete customer satisfaction. View More

We are committed to ensuring your complete satisfaction with every purchase. We understand that circumstances may arise where you must return a product or request a refund. If for any reason you are not satisfied, you may return the item(s) according to the terms outlined below. View More

This Payment Policy outlines the terms and conditions governing all payments made for products purchased through our website. By making a purchase, you agree to be bound by this Payment Policy. View More

Installation Steps

Step1: Disconnect power and gas supply, allow fryer to cool completely.

Step2: Remove control panel and carefully access the existing old thermostat assembly.

Step3: Detach bulb and capillary tube, noting routing for correct reinstallation.

Step4: Install new thermostat, securing fitting and positioning bulb properly.

Step5: Reassemble unit, restore power, and test temperature calibration for safe operation properly.
