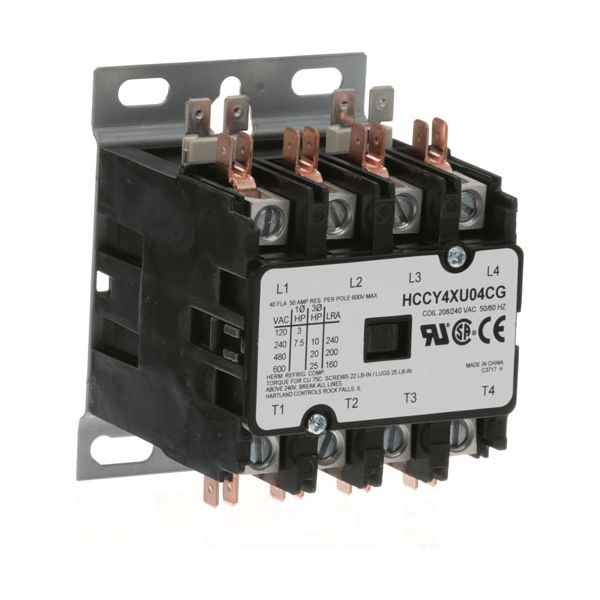
Middleby Marshall A25787 Oven 4-Pole Contactor 40A Inductive 50A Resistive 208/240V

Special Price $93.01 Regular Price $150.84
In stock
SKU
A25787
The Middleby Marshall A25787 4-Pole Contactor is an essential oven electrical part meant to regulate high power usage. It works at 208/240 volts and can support up to 40 inductive and 50 resistive loads, it can be used in different cooking appliances. This contactor improves safety and reliability when switching electrical circuits, and helps to prevent ovens from being overloaded. This makes it a durable product and cuts on maintenance expenses making it a perfect product for food service operations that require a reliable equipment in the kitchen.

Dimensions

  • Length: 4 In
  • Width: 3 In
  • Height: 3 In
  • Weight: 1.27 lbs
https://partsfe.com/media/catalog/product/m/i/middleby-marshall-a25787-oven-4-pole-contactor-40a-inductive-50a-resistive-208-240v-68756-2.jpg

Product Notes

  • Hartland Contactor
  • 4 Pole
  • 208/240 Volt
  • 40 Amp Inductive
  • 50 Amp Resistive
  • Bki
Write Your Own Review
You're reviewing:Middleby Marshall A25787 Oven 4-Pole Contactor 40A Inductive 50A Resistive 208/240V
Your Rating
Customer Questions
What maintenance is required for the Middleby Marshall A25787 Contactor?

Inspect and tighten electrical connections regularly to prevent overheating and arcing. Clean dust and debris from terminals and enclosure to maintain conductivity. Check coil performance and contact wear for pitting or burn marks.

What are common issues with the Middleby Marshall A25787 Contactor?

  • Contact welding or surface pitting.
  • Coil malfunction.
  • Overheating from loose wiring or excessive load.
  • Audible buzzing or chattering due to unstable voltage.
  • Burned or degraded contacts.

We strive to provide our customers with a hassle-free and efficient shopping experience. Our shipping policy ensures the timely delivery of your orders and complete customer satisfaction. View More

We are committed to ensuring your complete satisfaction with every purchase. We understand that circumstances may arise where you must return a product or request a refund. If for any reason you are not satisfied, you may return the item(s) according to the terms outlined below. View More

This Payment Policy outlines the terms and conditions governing all payments made for products purchased through our website. By making a purchase, you agree to be bound by this Payment Policy. View More

Installation Steps

Step1: Disconnect electrical power to the oven and follow lockout/tagout procedures.

Step2: Open the electrical control compartment and locate the existing contactor.

Step3: Label all incoming and outgoing wires before disconnecting them.

Step4: Remove the mounting hardware and take out the old contactor.

Step5: Install the new contactor and secure it firmly.

Step6: Reconnect all wires to the corresponding terminals according to the wiring diagram.

Step7: Restore power and test oven operation to verify proper contactor engagement and load switching.