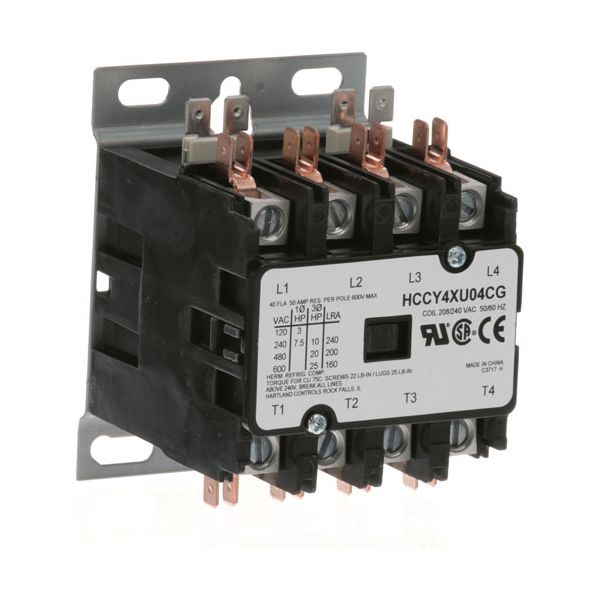
Garland 1489801 Fryer Contactor 4-Pole 40A 208/240V
Special Price $93.01 Regular Price $150.84
In stock
SKU
1489801
Manufacturer:

The Garland 1489801 Fryer Contactor 4-Pole 40A 208/240V is a necessary electrical switching system that operates the current flow to the heating coils of the fryer. It works through the opening and closing of its four poles to control the power flow in the system so that the operates of the unit can be constant. This contactor is made to be installed in commercial fryer assemblies, usually placed in the control, or electrical section of the appliance, to fit in with the existing wiring and parts. The way it is set up, and its specifications make it an essential component in the overall electrical operation of the fryer without disturbing other internal processes.
Dimensions
- Length: 4 In
- Width: 3 In
- Height: 3 In
- Weight: 1.27 lbs
Product Notes
- Hartland Contactor
- 4 Pole
- 208/240 Volt
- 40 Amp Inductive
- 50 Amp Resistive
- Bki