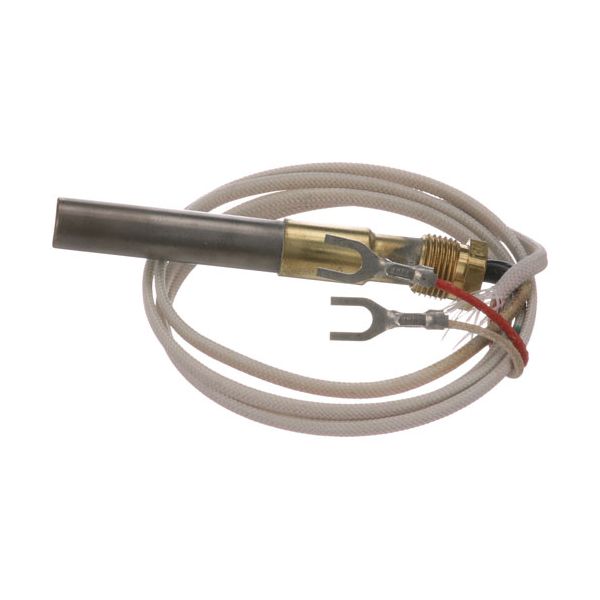
Atosa 301030006 Fryer 36" Thermopile 2-Lead 250-750 MV

Special Price $64.48 Regular Price $83.75
In stock
SKU
301030006
Fryer Parts,
Manufacturer:
Atosa 301030006 Fryer Thermopile is a quality 36” 2-lead thermopile that is used in converting heat in improve gas-powered cooking equipment. It operates within the power range of 250-750 MV and is suitable for different types of fryers, such as Cecilware, Cleveland, and Vulcan. It is also a Robertshaw 1950-53B replacement that ensures proper performance in fryers, griddles, and gas steam generators. It also increases energy efficiency, ensures steady ignition and temperature regulation, minimizes the time for maintenance, and increases the productivity of a kitchen. Especially for food preparation areas, it is useful in maintaining the efficiency of cooking and ensuring its longevity.

Dimensions

  • Length: 3.5 In
  • Width: 2.5 In
  • Height: 1 In
  • Weight: 0.2 lbs
https://partsfe.com/media/catalog/product/a/t/atosa-301030006-fryer-36-thermopile-2-lead-250-750-mv-83602-2.jpg

Product Notes

  • 36" 2 Lead, Thermopile, 250-750 Mv, Robertshaw 1950-53B
  • Cecilware Fryer Fmp 30, 40B, 403, 65, Fms 30, 54
  • Cleveland Boiler Gas Steam Generators: W/O Probes (100,000
  • Btu - 2 Burners~
  • 150,000 - 3 Burners)~
  • W/3 Probes (160,000
  • Btu - 3 Burners~
  • 200,000 - 4 Burners
  • Groen Braising Pan Hfp/2. Series: Chfp, Nhfp.
  • Imperial Fryer Series: If, Ihr, Ir.
  • Keating Griddle Model 48Bfld
  • Southbend Fryer Gfs, 4Fr-45
  • Star Fryer 404A, 615Fa, 630Fa
  • Tri-Star Fryer Tsf-3540, Tsf-4050, Tsf-6575
  • Vulcan Fryer: Tk, Rs, Ghf (Old Hf) Gr, Grd, Grc,Grs,
  • Wells Grill, Gas
  • Wolf Fryer Wtf-35,
Monitors pilot flame conditions in compatible Atosa commercial fryers by sensing heat at the pilot burner and generating the electrical signal required by the gas safety control system. The Atosa 301030006 Fryer Thermocouple provides continuous flame verification during the heating cycle, helping the gas control system determine whether the pilot flame is present. When the pilot remains established, the thermocouple supports continued gas valve operation; if the flame is lost, the reduced signal allows the safety system to interrupt gas flow. Proper sensing performance supports reliable ignition, burner operation, and fryer heating control.

Flame Detection:
Detects pilot flame heat through the sensing tip and converts the thermal response into a low-voltage electrical signal. This signal provides feedback to the gas safety control system, allowing it to verify flame presence during operation. Accurate positioning near the pilot burner helps maintain consistent flame sensing and supports proper burner operation.

Replacement Guidelines:
Replace the Fryer Thermocouple if it is damaged, bent, corroded, contaminated, or no longer provides reliable temperature sensing. The part number 301030006 and fryer thermocouple configuration should be verified before replacement to ensure the correct thermocouple is selected. Replace the thermocouple if deterioration affects temperature sensing, signal response, connection integrity, flame-control feedback, or normal fryer operation.

Common Failure Symptoms:

  • Pilot flame is not consistently detected.
  • Burner shuts down after pilot ignition.
  • Repeated ignition or relighting attempts.
  • Intermittent flame verification.
  • Fryer heating operation is interrupted.

Equipment Compatibility:
The Atosa 301030006 Fryer Thermocouple is designed for compatible Atosa commercial fryers requiring this thermocouple configuration. Verify the equipment model number and manufacturer part number before purchasing to ensure the correct application.

Technical Specifications:
Brand: Atosa
Part Number: 301030006
Component Name: Thermocouple
Appliance Type: Commercial Fryer

Write Your Own Review
You're reviewing:Atosa 301030006 Fryer 36" Thermopile 2-Lead 250-750 MV
Your Rating
Customer Questions
What maintenance is required for the Atosa 301030006 Thermopile?

Inspect the thermopile regularly for grease buildup, corrosion, or loose connections that may reduce voltage output. Clean the sensor area gently to ensure accurate flame sensing and stable millivolt generation. Verify secure wiring at both leads to prevent intermittent gas control issues. Always shut off gas and power before servicing to maintain safe operation.

What are common issues with the Atosa 301030006 Thermopile?

  • Inaccurate temperature readings.
  • Loose or disconnected leads.
  • Intermittent heating or failure to ignite.
  • Corrosion from oil or moisture exposure.

How does the Atosa 301030006 support fryer operation?

It detects the heat produced by the burner flame and provides the corresponding thermoelectric response for the fryer safety-control system.

Can thermocouple positioning affect flame detection?

Yes. The sensing tip needs to remain correctly positioned in relation to the pilot flame so it can produce a consistent thermal response.

What can cause a thermocouple to produce a weak signal?

Heat exposure, oxidation, carbon buildup, physical damage, loose connections, and normal component wear can reduce its electrical output.

Why does the burner shut down when the pilot flame is lost?

When the pilot flame is lost, the thermocouple signal decreases, allowing the gas safety system to interrupt gas flow and prevent continued burner operation.

We strive to provide our customers with a hassle-free and efficient shopping experience. Our shipping policy ensures the timely delivery of your orders and complete customer satisfaction. View More

We are committed to ensuring your complete satisfaction with every purchase. We understand that circumstances may arise where you must return a product or request a refund. If for any reason you are not satisfied, you may return the item(s) according to the terms outlined below. View More

This Payment Policy outlines the terms and conditions governing all payments made for products purchased through our website. By making a purchase, you agree to be bound by this Payment Policy. View More

Installation Steps

Step1: Turn off gas supply to the fryer.

Step2: Access the pilot assembly inside the fryer cabinet.

Step3: Disconnect the two thermopile leads from the gas valve.

Step4: Remove the thermopile from the pilot bracket.

Step5: Install the new thermopile, reconnect leads securely, relight the pilot, and verify proper millivolt output.