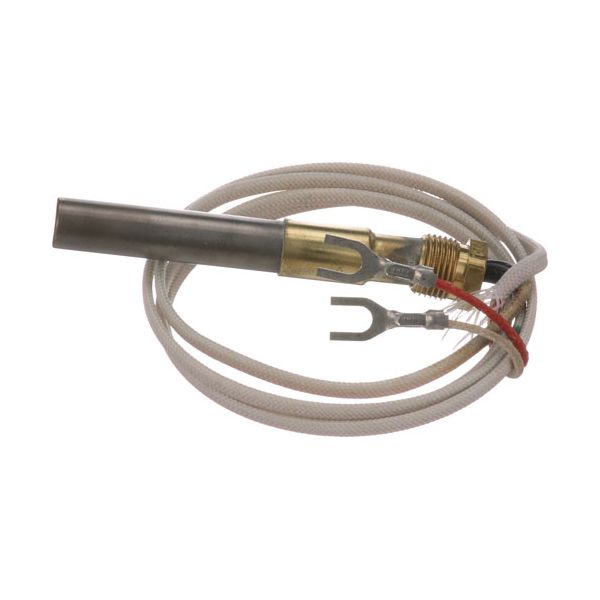
Frymaster 8100159 Fryer 36" Thermopile 2 Lead 250-750 MV

Special Price $64.48 Regular Price $83.75
In stock
SKU
8100159
The Frymaster 8100159 Thermopile is a two-lead sensor of the type PG9, which transforms the heat of the pilot flame of the fryer into electrical energy to open the gas valve. It is installed in commercial fryers to make sure that the gas supply is only on when pilot light is on, which is an accurate source of ignition and is safe. This thermopile is essential in temperature regulation, and energy control which assists the fryer in maintaining a constant temperature in cooking processes in food service settings.

Dimensions

  • Length: 3.5 In
  • Width: 2.5 In
  • Height: 1 In
  • Weight: 0.2 lbs
https://partsfe.com/media/catalog/product/f/r/frymaster-8100159-fryer-36-thermopile-2-lead-250-750-mv-55093-2.jpg

Product Notes

  • 36" 2 Lead, Thermopile, 250-750 Mv, Robertshaw 1950-53B
  • Cecilware Fryer Fmp 30, 40B, 403, 65, Fms 30, 54
  • Cleveland Boiler Gas Steam Generators: W/O Probes (100,000
  • Btu - 2 Burners~
  • 150,000 - 3 Burners)~
  • W/3 Probes (160,000
  • Btu - 3 Burners~
  • 200,000 - 4 Burners
  • Groen Braising Pan Hfp/2. Series: Chfp, Nhfp.
  • Imperial Fryer Series: If, Ihr, Ir.
  • Keating Griddle Model 48Bfld
  • Southbend Fryer Gfs, 4Fr-45
  • Star Fryer 404A, 615Fa, 630Fa
  • Tri-Star Fryer Tsf-3540, Tsf-4050, Tsf-6575
  • Vulcan Fryer: Tk, Rs, Ghf (Old Hf) Gr, Grd, Grc,Grs,
  • Wells Grill, Gas
  • Wolf Fryer Wtf-35,
Write Your Own Review
You're reviewing:Frymaster 8100159 Fryer 36" Thermopile 2 Lead 250-750 MV
Your Rating
Customer Questions
What maintenance is required for the Frymaster 8100159 Thermopile?

Inspect the thermopile regularly for soot buildup, corrosion, or loose lead connections that may reduce millivolt output. Keep the pilot flame clean and properly aligned so it fully heats the thermopile surface. Verify stable voltage generation within the required range and ensure wiring insulation remains intact. Shut off gas and allow fryer components to cool before servicing.

What are common issues with the Frymaster 8100159 Thermopile?

  • Weak millivolt output causing pilot light failure.
  • Loose or damaged lead connections.
  • Improper placement in flame reducing efficiency.
  • Heat damage or residue buildup impacting performance.

We strive to provide our customers with a hassle-free and efficient shopping experience. Our shipping policy ensures the timely delivery of your orders and complete customer satisfaction. View More

We are committed to ensuring your complete satisfaction with every purchase. We understand that circumstances may arise where you must return a product or request a refund. If for any reason you are not satisfied, you may return the item(s) according to the terms outlined below. View More

This Payment Policy outlines the terms and conditions governing all payments made for products purchased through our website. By making a purchase, you agree to be bound by this Payment Policy. View More

Installation Steps

Step1: Turn off fryer power and gas supply, and allow the unit to cool completely before beginning work.

Step2: Remove the existing thermopile from the burner assembly without damaging surrounding components.

Step3: Position and secure the new thermopile in the proper flame path for accurate sensing.

Step4: Reconnect electrical leads firmly to the control valve or ignition module.

Step5: Restore gas, relight fryer, and confirm stable flame and safe operation, checking for leaks.