
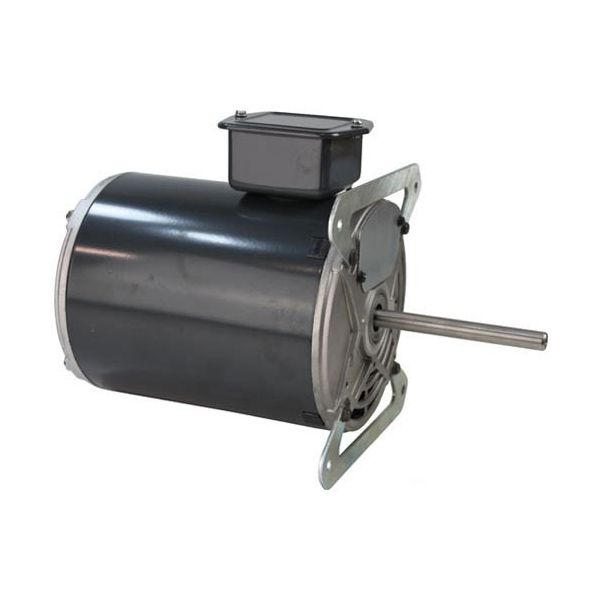
Southbend 1175567 Oven Blower Motor W/ 2 Flats 7.2/4.5AMP 1PH CW

Special Price $589.30 Regular Price $763.94
In stock
SKU
1175567
Manufacturer:
The Southbend 1175567 Oven Blower Motor is the part necessary to improve the circulation of air across cavities and provide consistent heat. This runs at 115V with dual speed capability to efficiently transform electrical to mechanical energy to turn the fan to blow hot air across the component. Some advantages that can be associated with this part include better cooking uniformity, shorter cooking cycles, as well as energy conservation, which is essential for keeping up high levels of productivity within a rather chaotic environment of a working kitchen.

Dimensions

  • Length: 10.4 In
  • Width: 8.15 In
  • Height: 7 In
  • Weight: 23 lbs
https://partsfe.com/media/catalog/product/s/o/southbend-1175567-oven-blower-motor-w-2-flats-7-2-4-5amp-1ph-cw-24842-2.jpg

Product Notes

  • [ 115V, 50/60Hz ] [ .5/.25 Hp, ] [1P ] [1725/1140 RPM ]
  • [7.2/4.5Amp ] [Cw Rotation From The Rear Of The Motor ]
  • Frame 56Z, 2 Speed.
  • [ 1/2" X 4-1/2" Shaft W/ 2 Flats]
  • White Common
  • Black Power To Fan Switch - Hi
  • Red Power To Fan Switch - Lo
  • Blue/Purple Or Brown/Brown To Centrifugal Switch.
  • If Oven Does Not Have Centrifugal Switch Then
  • Wire Together W/ Wire Nut.
  • If Only Using For One Speed, Then Wire Nut Red Wire.
  • Southbend
  • Oven Series:300,400,B,Bbb,Gb, Gs, Eh,P, Slgs
Write Your Own Review
You're reviewing:Southbend 1175567 Oven Blower Motor W/ 2 Flats 7.2/4.5AMP 1PH CW
Your Rating
Customer Questions
What maintenance is required for the Southbend 1175567 Blower Motor?

Regularly inspect the blower motor for dust buildup and clean the fan blades and housing to ensure proper airflow. Check electrical connections for tightness and signs of wear. Lubricate bearings if applicable and listen for unusual noises. Always disconnect power before servicing for safety.

What are common issues with the Southbend 1175567 Blower Motor?

  • Motor overheating during extended operation.
  • Unusual noise or vibration from worn bearings.
  • Failure to start due to electrical faults.
  • Reduced airflow from damaged or misaligned fan blades.
  • Intermittent operation caused by loose wiring.

We strive to provide our customers with a hassle-free and efficient shopping experience. Our shipping policy ensures the timely delivery of your orders and complete customer satisfaction. View More

We are committed to ensuring your complete satisfaction with every purchase. We understand that circumstances may arise where you must return a product or request a refund. If for any reason you are not satisfied, you may return the item(s) according to the terms outlined below. View More

This Payment Policy outlines the terms and conditions governing all payments made for products purchased through our website. By making a purchase, you agree to be bound by this Payment Policy. View More

Installation Steps

Step1: Disconnect power, turn off breaker, apply lockout/tagout, let oven cool completely.

Step2: Remove rear panel, note wiring and blower orientation carefully.

Step3: Disconnect electrical connections and unbolt old motor assembly.

Step4: Install new motor, align shaft flats, secure mounting bolts.

Step5: Reconnect wiring for CW rotation, ensure tight terminals.

Step6: Reassemble panel, restore power, test airflow and operation safely, monitor for unusual noise or vibration.