
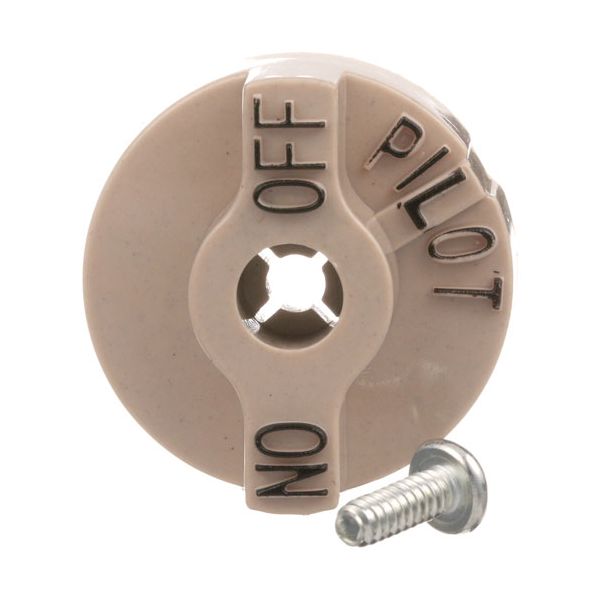
Keating 004803 Fryer Valve Knob W/Screw 1-1/4" DIA OFF-PILOT-ON

$1.40
In stock
SKU
004803
Oven Parts, Oven Knobs,
Manufacturer:
The Keating 004803 Fryer Valve Knob with Screw 1-1/4 DIA is a control part used in commercial cooking equipment, which enables the operator to regulate the flow of gas or liquid inside the part. It works by switching between OFF, PILOT, and ON giving fine control over the valve connected. The knob is normally attached to the control panel using a screw to hold it in place when in operation. This element is widely applied in restaurants, cafeterias, and other food service facilities where the equipment is used, and it assists the appliance in regulating the amount of heat.

Dimensions

  • Length: 1.25 In
  • Width: 1.25 In
  • Height: 0.75 In
  • Weight: 0.01 lbs
https://partsfe.com/media/catalog/product/k/e/keating-004803-valve-knob-1-1-4-dia-off-pilot-on-mounts-with-screw-94836-2.jpg

Product Notes

  • Dial & Screw For 700 Series Gas Pilot Safety Valves
  • [ 1-1/4 Dia ] [ Off-Pilot-On] [Mounts With Screw ]
  • Rsw Mfg # 1751-012
AMERICAN RANGE:
BAKERS PRIDE:
HENNY PENNY:
IMPERIAL:
28328, IMP28328
KEATING:
004803, 4803, H00356H, KEA4803, KEAH00356H
MAGIKITCH'N:
MIDDLEBY MARSHALL:
ROYAL RANGE:
SOUTHBEND:
U-LINE:
1751-012
Write Your Own Review
You're reviewing:Keating 004803 Fryer Valve Knob W/Screw 1-1/4" DIA OFF-PILOT-ON
Your Rating
Customer Questions
What maintenance is required for the Keating 004803 Valve Knob?

Clean the knob regularly to prevent debris buildup and ensure smooth operation. Check the mounting screw for tightness and secure fit. Lubricate internal components lightly if stiffness occurs. Proper maintenance ensures accurate switching and safe operation.

What are common issues with the Keating 004803 Valve Knob?

  • Loose mounting screw causing wobble or misalignment.
  • Stiff or jammed rotation due to internal wear.
  • Cracked or worn knob surface affecting grip.
  • Misalignment with valve stem causing improper control.

We strive to provide our customers with a hassle-free and efficient shopping experience. Our shipping policy ensures the timely delivery of your orders and complete customer satisfaction. View More

We are committed to ensuring your complete satisfaction with every purchase. We understand that circumstances may arise where you must return a product or request a refund. If for any reason you are not satisfied, you may return the item(s) according to the terms outlined below. View More

This Payment Policy outlines the terms and conditions governing all payments made for products purchased through our website. By making a purchase, you agree to be bound by this Payment Policy. View More

Installation Steps

Step1: Turn off the gas supply and allow the equipment to cool completely before servicing.

Step2: Remove the damaged gas valve knob by loosening the retaining screw from the valve stem.

Step3: Inspect the valve stem for wear, grease buildup, or damage before installing the replacement knob.

Step4: Align the new knob with the valve stem and secure it using the mounting screw.

Step5: Verify smooth rotation without slipping or binding.

Step6: Restore gas supply and test for safe valve operation.