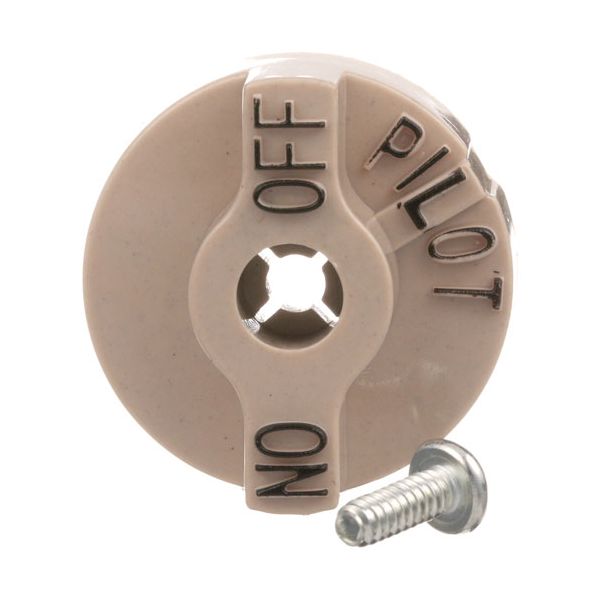
Frymaster 8100109 Gas Valve Knob W/Screw 1-1/4" DIA OFF-PILOT-ON

$1.40
In stock
SKU
8100109
The Frymaster 8100109 Gas Valve Knob is a 1-1/4" diameter control valve that is used to control gas burners in commercial appliances with high accuracy. It has well-labelled OFF, PILOT, and ON settings that enable the burner and pilot to be operated directly. The knob is fixed on the valve stem using a screw that keeps it always in the same position when it is used again and again. It is usually placed on the front panel of the appliance and serves as the main control point of interaction with the pilot light and regulation of the flame intensity.

Dimensions

  • Length: 1.25 In
  • Width: 1.25 In
  • Height: 0.75 In
  • Weight: 0.01 lbs
https://partsfe.com/media/catalog/product/f/r/frymaster-8100109-valve-knob-1-1-4-dia-off-pilot-on-mounts-with-screw-27598-2.jpg

Product Notes

  • Dial & Screw For 700 Series Gas Pilot Safety Valves
  • [ 1-1/4 Dia ] [ Off-Pilot-On] [Mounts With Screw ]
  • Rsw Mfg # 1751-012
AMERICAN RANGE:
BAKERS PRIDE:
HENNY PENNY:
IMPERIAL:
28328, IMP28328
KEATING:
004803, 4803, H00356H, KEA4803, KEAH00356H
MAGIKITCH'N:
MIDDLEBY MARSHALL:
ROYAL RANGE:
SOUTHBEND:
U-LINE:
1751-012
Write Your Own Review
You're reviewing:Frymaster 8100109 Gas Valve Knob W/Screw 1-1/4" DIA OFF-PILOT-ON
Your Rating
Customer Questions
What maintenance is required for the Frymaster 8100109 Valve Knob?

Clean the knob regularly to remove grease and food debris. Ensure the mounting screw remains tight to prevent wobbling. Inspect alignment in positions to ensure safe operation and smooth gas control.

What are common issues with the Frymaster 8100109 Valve Knob?

  • Worn lettering or position indicators are fading.
  • Stripped mounting screw threads.
  • Stiff or hard-to-turn rotation.
  • Cracking or heat damage to plastic.
  • Loose fit on valve stem.
  • Knob slipping on the shaft.

We strive to provide our customers with a hassle-free and efficient shopping experience. Our shipping policy ensures the timely delivery of your orders and complete customer satisfaction. View More

We are committed to ensuring your complete satisfaction with every purchase. We understand that circumstances may arise where you must return a product or request a refund. If for any reason you are not satisfied, you may return the item(s) according to the terms outlined below. View More

This Payment Policy outlines the terms and conditions governing all payments made for products purchased through our website. By making a purchase, you agree to be bound by this Payment Policy. View More

Installation Steps

Step1: Turn off the gas supply and allow the unit to cool completely before servicing.

Step2: Pull the damaged valve knob straight off the gas valve stem or remove retaining screw if installed.

Step3: Inspect the valve stem for grease buildup, cracks, or damage before installing the new knob.

Step4: Align the flat side of the new knob with the valve stem and press firmly into place.

Step5: Secure retaining screw if applicable and confirm smooth operation.

Step6: Restore gas supply and test knob movement for safe, proper control.